


D-160 Owner's manual (SETUP mode)
169
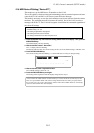
11-a. When the D-160 has finished saving the song data, it will display “COMPLETED!” and then
return to the normal time base display.
* Press either the STOP button or EXIT/NO key to return from the second step menu to the
first or to quit SETUP mode. The menu will go backwards each time you press either key.
If you press these keys after you have started the saving process in 8, only the data that
has already been saved will be effective. The data that has not been saved yet will be invalid.
Save to “adat”
5-b. Choose “adat” with the JOG dial and press the EXECUTE/YES key.
The display will show “SAVE”. The display will also start flashing the current program number
on the internal hard disk drive, which you are saving the song data from.
6-b. With the JOG dial, choose the program number which you want to save.
You can choose any program available on the internal IDE drive to save the song data.
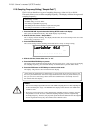
7-b. Press the EXECUTE/YES key after you have chosen the program.
The display will show “SAVE”. The display will also show the recorded program length “Length?
**m**s”. This length is limited up to 59 minutes 59 seconds.
If you want to save the full length of the recorded data, follow the procedure below. However,
you can also edit the song length to be saved, which means either increasing or decreasing it, at
this stage.
8-b. Press the EXECUTE/YES key once again. The display will show “SAVE”.
The display will also start showing the menu from which you can choose the tracks you want to
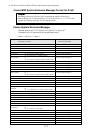
save. Choose the setting with the JOG dial. Available loading track settings are ;
1-8, 1-16, 1-24, 9-16, 9-24, 17-24.
9-b. Press the EXECUTE/YES key after you have chosen the tracks you want.
The display will start flashing “SURE?”.
The display will also show “Rec Start adat!”. This means the D-160 is asking you to start recording
onto the adat machine connected to the D-160, which has a tape you will record with the song
data.
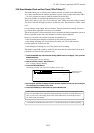
10-b. Start recording adat first then press the EXECUTE/YES key afterwards.
The display will start showing “REMAIN”.
In a few seconds, the display will start showing the count down time display indicating how
long the save process is going take. The D-160 has now started saving the data.
The actual save process starts at the moment the display starts showing the count down time.
Saving to adat is done via using an 8 track signal one after the other, e.g. 1-8 then 9-16 then17-
24.
11-b. When the D-160 has finished saving song data, it will display “COMPLETED!” and then return
to the normal time base display.
* Press either the STOP button or EXIT/NO key to return from the second step menu to the
first or to quit SETUP mode. The menu will go backwards each time you press either key.
If you press these keys after you have started the saving process in 10, only the data that
has already been saved will be effective. The data that has not been saved yet will be invalid.
Save to “SCSI” (Program by Program)
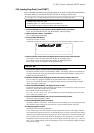
5-c. Choose “SCSI” with the JOG dial and press the EXECUTE/YES key.
The display will show “SAVE”. The display will also start flashing the current program number
on the internal hard disk drive, which you are saving the song data from, e.g. “P02[Title]”.
6-c. With the JOG dial, choose the program number which you want to save.
You can choose any program available in the internal IDE drive on which to save the song
data. (See next section if you want to save ALL the programs at once .)
As far as saving is concerned, there are two types of program available:
One is a type of program whose data can fit on only one disk and another is one that requires
more than two disks. The display will appear as follow.
* A program that displays only the program number. This type of program can be saved on one
disk, e.g. “P02 [Title]”.