


D-160 Owner's Manual (Recording /Playback)
54
4
. To stop recording, press the STOP button.
"Please Wait!" will be shown in the display while the post recording process is in progress.
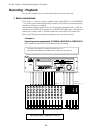
Playback
5
. Press the "READY" track's RECORD TRACK select key to switch to "SAFE." (The track
indicator will turn off.)
6
. Press the STOP button and the REWIND button simultaneously to locate the beginning
of the Program (ABS 0).
7
. Press the PLAY button.
The recorder will start playback data. Adjust the TAPE IN input level on the mixer while
monitoring.
In this way, you can record sound source to any track (a single track or multiple
tracks).
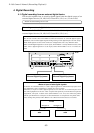
3-2. Recording with the Program Change function
(Switching Programs P01-P99)
As previously explained, the D-160 has a "Program Change Function" to manage
up to ninety-nine songs. You can record, playback, and edit each Program separately.
This section explains how to record and play back Programs using the Program
Change function.
* Restore the default settings on the D-160.
Changing a Program
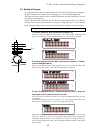
1
. Set the Program to be recorded.
Select the desired Program by referring to the previous "2-2. Program Change."
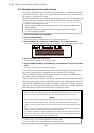
When you select a Program, the Time Base setting (ABS, MTC, or BAR/BEAT/CLK)
you used previously for that Program will be used again.
To change the Time Base display, Press the DISP SEL key while holding down the
EXECUTE/YES key. You can set the Time Base for each Program individually.
You can also switch to the REMAIN indication by pressing the DISP SEL key.
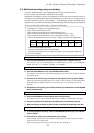
Check to see if there is enough time (bars) remaining for recording.
This value is not an available time for each Program, but the total available time
for all Programs.
2
. Set the sampling rate if necessary.
Refer to section “2-4. Setting a sampling rate” for the correct procedure.
Recording (Refer to “3-1. Basic recording/playback” for details.)
3
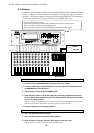
. Press the RECORD TRACK select key (1-16) to set the recording track in ready mode.
4
. Press the RECORD button once to set the unit in input monitoring status, and adjust the
recording level.
5
. Press the RECORD button while holding down the PLAY button.
6
. When recording is complete, press the STOP button.
"Please Wait!" will be shown in the display while the post recording process is in progress.