


D-160 Owner's manual (SETUP mode)
158
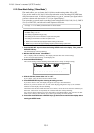
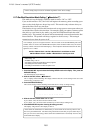
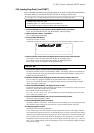
4-A. In the case of SPDIF signal input, enter whichever two tracks you want with the JOG dial.
Use either the HOLD/> key or SHUTTLE dial to move the flashing Channel display between Lch
and Rch.
Available track settings are tracks 1 ~ 16 and “- -” which means no tracks are assigned.
<Note>
You cannot assign the same track to both Lch and Rch. If you accidentally do this, the later
setting will be effective and the D-160 will automatically cancel the previous track assignment
to “- -”, so that nothing is assigned there. The later setting will always be prioritized.
* The D-160 can also record only one channel from the stereo SPDIF signal.
For example, if you assign Lch to track 4 and Rch to NIL, “L04 R- -”, the D-160 will record
only SPDIF Lch on track 4.
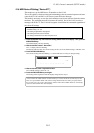
4-B. For an adat digital signal, enter “adat” with the JOG dial after making the Lch flash with either
the HOLD/> key or SHUTTLE dial.
You cannot choose “adat” when the Rch is flashing.
* The adat digital input signal will be assigned as DATA INPUT 1-8 to tracks 1 ~ 8 and
DATA INPUT 9-16 to tracks 9 ~ 16 accordingly.
* For analog input, you need to select nothing on either the Lch and Rch.
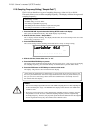
5. Press the EXECUTE/YES key to register the tracks you have chosen.
The display will go back to the display of item 2.
When the D-160 recognizes an incoming digital signal correctly, the red “digital” display will
stop flashing.
* If the red “DIGITAL” indication is flashing, check the connection and cable between D-160
and the external digital equipment.
<Notes>
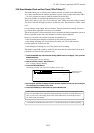
* If you set up the wrong sampling frequency for the incoming SPDIF, the display will flash
either 44.1k or 48kHz on the FS indicator as a warning message.
* For adat signal input, there is no warning message indication. Be careful of the frequency
sampling setting.
6. Press the STOP button or EXIT/NO key to exit this mode.
* Press either the STOP button or EXIT/NO key to return from the second step menu to the
first or to quit SETUP mode. The menu will go backwards each time you press either key so
that you can correct the setting, choose some other SETUP mode, or eventually return to
the normal time base display.
<Notes>
* Tracks assigned for digital input will become exclusively digital input only. Hence no
analog recording on those tracks is possible. If you want to use some D-160 tracks for
analog input, you have to select “- -” in both the Lch and the Rch or assign some other
tracks. In the “adat” setting, either tracks 1-8 or 9-16 will automatically be assigned for
digital input. So, the tracks which have not been assigned can still be used for analog
recording. For example, if you connect the adat signal to DATA INPUT 1-8, you can
record digital on tracks 1-8 and analog on tracks 9-16. The D-160 can manage digital/
analog 16 track simultaneous recording.
* Vari Pitch function will be automatically OFF ( No LED lights up), when you set up this
digital input mode.
* The input digital signal you choose in this mode will override the type of external sync
signal you might have chosen with “2-12. Slave Mode Setting” such as Vari, SPDIF, adat or
Free. Therefore, the D-160 will ignore the Slave Mode setting and the slave function will
become the sync lock synchronization with the chosen input digital signal in this mode.