


D-160 Owner's Manual (Punch In/Out)
76
SHIFT
AUTO
CLIPBOARD PLAY
LOCATE ABS 0
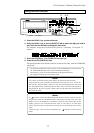
DIGITAL MULTITRACK RECORDER
D-160
IN / OUT
PUNCH
PGM CHANGE
8/167/156/145/134/123/112/101/9
RECORD TRACK
HD ACCESSLOCKED MTC IN
ENDIN OUTSTART
AUTO PUNCH
AUTO PLAY IN OUT
AUTO RTN
CLIPBOARD
PASTEMOVECOPY
AUTO RTN
ERASE UNDO REDO
DISP SEL
EXECUTE
/YES
EXIT
/NO
HOLD/ STORE RECALL
TIME BASE SEL
TAKE
REHEARSAL
LOCATEPUNCH
F FWDREWINDPLAYSTOPRECORD
VARI PITCH
LOCATE ABS END
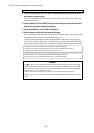
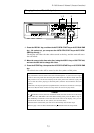
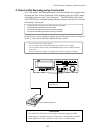
1. Auto Punch In/Out
To perform Auto Punch In/Out recording, first you need to specify the In
point (recording start point) and the Out point (recording end point).
Once these two points are stored, the D-160 automatically starts recording
at the In point and stops recording at the Out point while the recorder is in
"Take mode." When you use the Auto Punch In/Out function, you can
select "Rehearsal mode" to practice to your satisfaction before you record.
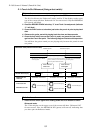
1-1. Storing the Punch In/Punch Out point
Here, we assume that Program 1 with the “ABS” Time Base has been selected.
If you wish to choose other Program, press the STORE key while holding
down the HOLD/> key.
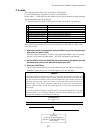
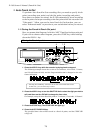
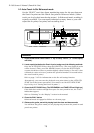
Storing the Punch In point
1, 2
4
3
2
1. Press the HOLD/> key while the recorder is playing back or stopped.
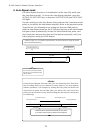
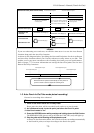
The following example shows that a time of two minutes, 40 seconds, 3 frames,
and 28 sub-frames is held, and the Program indication is changed to the sub-
frame indication.
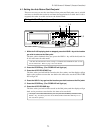
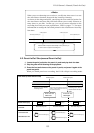
3. Press the STORE key. (The STORE LED will light up.)
4. Press the AUTO PUNCH IN key.
The specified time value will be stored as a Punch In point, and the STORE LED
will go off.
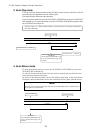
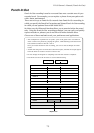
2. Press the HOLD/> key or turn the SHUTTLE dial to select the digit you wish to
edit, and then use the JOG dial to change the time value.
For example, setup the Auto Punch In point to "3 minutes, 15 seconds, 10 frames".
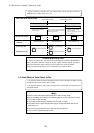
* Pressing the STORE key will enter the D-160 to into hold/edit status.
In this case, you can omit step 3 below.
Blink (Edit point)