


D-160 Owner's Manual (Edit function)
98
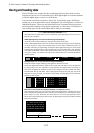
Press the EXIT/NO key, DISP SEL key, or the STOP button to restore the original display.
The sound data in the specified range has been erased.
* To cancel the erase operation while the message “SURE?” is flashing on the display, press
the EXIT/NO key or the STOP key.
* If you wish to cancel the erase operation after you have pressed the EXECUTE/YES key,
press the EXIT/NO key or the STOP button BEFORE the message “COMPLETED!” appears.
* If you cancel the erase operation during the process, nothing will be erased.
<Check points>
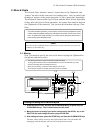
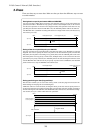
Erasing the specified area between ABS 0 and ABS END will not affect the ABS END position.
You can confirm this by pressing the F. FWD button while holding down the STOP button
after the erase operation is complete. You will see no change in the ABS END time on the
display. This means that erasing the specified area has replaced the data with silence,
without moving the ABS END point .
However, the available recording time will increase by the amount of data you erased.
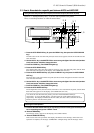
You can check this by pressing the DISP SEL key to see the REMAIN value calculated based
on a single mono track.
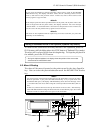
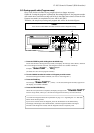
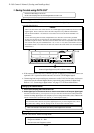
3-2. Undo and redo of the erase operation
You can use the Undo and Redo functions for the erase operation.
* After the erase operation is complete, press the UNDO key.
The D-160 will restore the data that existed before you executed the erase operation.
* Press the REDO key after using the UNDO function.
The D-160 will restore the status that existed after you executed the erase operation.
Pressing the UNDO key or the REDO key will execute the corresponding operation
immediately, and the display will indicate the messages “COMPLETED!” and “Undo!” or
“Redo!”, and then return to the previous Time Base indication.
<Note>
You can use the Undo/Redo function while the D-160 transport section is stopped.
You cannot use the Undo/Redo function after one of the following operations:
1. You make a new recording.
2. You perform a new editing operation (such as copy & paste, move & paste, and erase).
3. When the Auto Punch mode is on, and playback or recording passes the Auto Punch In
point.
4. You turn off the power.
5. You use the Program Change function.