


Upgrading an existing S8300A to R3.1 using the Web pages
250 Installing and Upgrading the Avaya G700 Media Gateway and Avaya S8300 Media Server
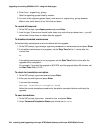
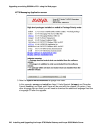
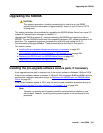
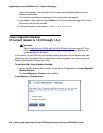
7. When the backup is finished, you will see
The final status for your backup job is shown below
on the Backup History Result screen. Check for any errors reported on this screen. You
should see a Success message for each backup set.
8. If the AUDIX options are available, repeat Steps 3–7 for AUDIX Announcements.
Recording configuration information
If you have not already done so, you must record the current server configuration data, which
will be re-entered after the upgrade. If you are upgrading from release 1.2 or later, most of the
configuration data will be re-entered automatically with the restore process. However, if you are
upgrading from a pre-1.2 release, you will need to re-enter all of the server configuration data.
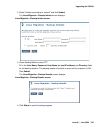
To view and record the current configuration data
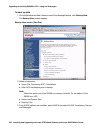
1. Launch the Maintenance Web Interface.
2. Under Server Configuration and Upgrades, click Configure Server.
3. Click Continue on the first and second screen.
4. On the Select method for configuring server screen, select Configure all services
using the wizard and click Continue.
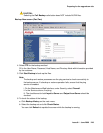
5. View and record the configuration information on each screen, and click Continue to move
to the next screen.
6. When you get to the Update System screen, click Cancel.
The best way to record the configuration data is to fill in the Electronic Pre-installation
Worksheet (EPW). You then have the option to use the Installation Wizard to do the server
configuration task. If you do not have the EPW, you can record the current configuration data
and enter it manually after the upgrade.
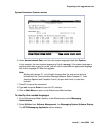
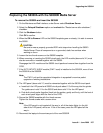
7. If upgrading from 1.2 or later, record the data displayed on the Configure Interface screen:
- Server IP address
- Gateway IP address,
- Subnet mask
You can skip the remaining configuration screens.
8. If upgrading from pre-1.2 release, record the data from all configuration screens.