


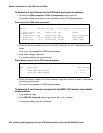


Manual installation of a new G700 with an S8300
512 Installing and Upgrading the Avaya G700 Media Gateway and Avaya S8300 Media Server
Installing new firmware on the media modules
For upgrades of active media modules, you need to take the media modules out of service
before initiating the upgrade process. To do this, go to a SAT session on the primary controller
and issue a busyout command.
Note:
Note: Skip this busyout procedure if the media modules are not in service; for example
during an initial installation.
To busyout board (for active media modules)
1. Go to a SAT session on the primary controller and enter the command,
busyout board vx
where x is the slot number of the media module to be upgraded.
2. Verify the response,
Command Successfully Completed
3. Repeat for each media module to be upgraded.
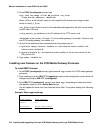
To install media module firmware
1. Be sure that you have checked for the current vintage of the VoIP Module for the v0 slot (on
the G700 motherboard).
This VoIP module does not occupy a physical position like other media modules.
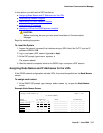
2. At the P330-1(configure)# prompt, type session mgp.
3. At the MG-001-1(super)# prompt, type configure to change to the configuration mode.
4. Type copy tftp mm-image v<slot #> <filename mm>
<tftp_server_ip_address>
where
<slot #> is the slot of the specific media module,
<filename mm> the full-path name of the media module firmware file in a format such as
mm712v58.fdl, and
<tftp_server_ip_address> is the ip address of the S8300.
Two or three minutes will be required for most upgrades. The VoIP media module upgrade
takes approximately 5 minutes. Screen messages indicate when the transfer is complete.
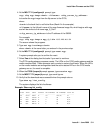
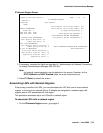
5. After you have upgraded all the media modules, verify that the new versions are present.
At the MG-???-1(configure)# prompt, type show mg list_config
The list of software appears.