


On-site Preparation for the Upgrade
Issue 9.1 June 2006 687
2. Type telnet 192.11.13.6 and press Enter.
3. Log in as either craft or dadmin.
4. Type update_unpack and press Enter.
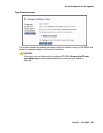
5. Select the number corresponding to the service pack file. (For example,
00.0.339.4-xxxx.tar.gz). Press Enter.
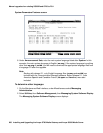
6. Type update_show and press Enter to list Communication Manager files to verify that the
new service pack file was unpacked.
7. Type update_activate update, where update is the release or issue number of the
latest service pack file. (For example, 00.0.339.4-xxxx. Do not use the .tar.gz extension
at the end of the file name). Press Enter.
The media server may reboot. If it reboots, it also may display the message
/opt/ecs/sbin/drestart 2 4 command failed.
Ignore this message. You must wait until the restart/reset completes before entering
additional commands.
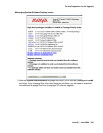
The media server displays a message that the service pack was applied.
8. Type update_show again and press Enter to list Communication Manager files to verify
the service pack file was activated.
9. Enter y in response to the question, Commit this software?
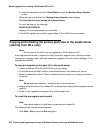
Copying license, authentication, and post-upgrade service pack files
to the S8300 hard drive (from your laptop)
Skip to Copying the software and firmware files to the server on page 689 if you are not
installing a new license or password file.
For an upgrade, you need to install a license file when:
● Upgrading to a new major release of Communication Manager (for example, R2.x to R3.x
or R3.0 to R3.1)
● Changing the feature set
Note:
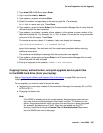
Note: If the S8300 is already set up for remote access, Avaya services personnel can
copy new license and authentication files directly into the FTP directory on the
server. Avaya personnel will notify you when the new files are in place as agreed
(for example, by telephone or E-mail). After they are loaded into the FTP
directory, install them using the License File and Authentication File screens
from the S8300 main menu web-page.