


Manual upgrade of an existing S8300B and G700 to R3.1
686 Installing and Upgrading the Avaya G700 Media Gateway and Avaya S8300 Media Server
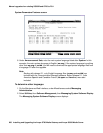
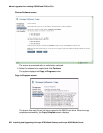
b. Select the backup file and click Check Status to open the Backup History Results
screen.
When the backup is finished, the Backup History Results screen displays
The final status for your backup job is shown below.
For each backup set, the message
BACKUP SUCCESSFUL
displays, if the set was backed up successfully.
7. If the AUDIX options are available, repeat Steps 3–6 for AUDIX Announcements.
Copying and installing the service pack files to the media server
(starting from R2.x only)
Note:
Note: Do not perform this task if you are upgrading an R3.0 release to R3.1.
A pre-upgrade service pack is required to modify the server upgrade tools, including the web
Interface and upgrade scripts, which will enable the upgrade to Communication Manager 3.1 to
complete successfully.
To copy pre-upgrade service pack file to the media server
1. Insert the software CD in the CD-ROM drive of your laptop.
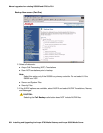
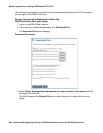
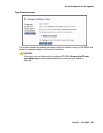
2. On the Maintenance Web Interface, under Miscellaneous, click Download Files.
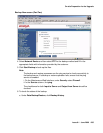
3. Select the download method, “Files to download from the machine I’m using to connect to
the server.”
Note:
Note: Do not select the checkbox, “Install this file on the local server.”
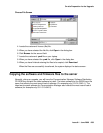
4. Browse to the directory on the software CD (or laptop) that contains the pre-upgrade service
pack file.
5. Select the pre-upgrade service pack file and click Download.
To install the pre-upgrade service pack
Note:
Note: Use a telnet session to install and activate the service pack file.
The following steps activate the service pack.
1. Click Start > Run to open the Run dialog box.