


179
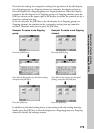
Easy selection of a series of actions
(macro) programmed for Zapping (ZAPPING)
5
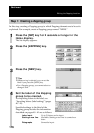
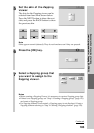
Set the label of the Zapping element.
When the label setting is complete, press the [OK] key. For inputting
letters to the label, see “Inputting letters (label setting)” (pages 40 - 41).
Specified settings to the label of the Zapping element besides the
information described on pages 40 - 41 are as follows.
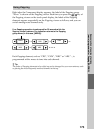
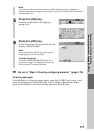
Letter input: Up to 31 letters can be input.
Starting a new line:Available. Starting a new line is counted as a
letter.
Pictographs: Cannot be input.
Note
You cannot set the same label name as another Zapping element, regardless of
whether characters are upper or lowercase. If you try to set the same label name, a
beep sounds twice.
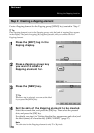
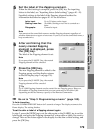
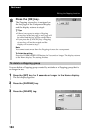
6
After confirming that the
newly created Zapping
element is displayed, press
the [OK] key.
The label of the Zapping element is set.
Note
If you press the [CANCEL] key, the created
Zapping element will be canceled.
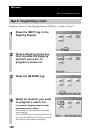
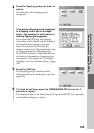
7
Press the [OK] key.
The new Zapping element is added to the
Zapping group, and the display returns
to the Set display (step 2 on page 176).
Note
If you press the [CANCEL] key, the created
Zapping element will be canceled.
z Tip
Up to 1,000 Zapping elements can be created for one Zapping group. However,
the number of Zapping elements that you can create may be less than 1,000
depending on the free memory capacity of the Remote Commander.
, Go on to “Step 3: Programming a macro” (page 180).
To finish the setting
Press the COMMANDER OFF button for 2 seconds or longer. The display returns to the
Home display. The setting finishes.
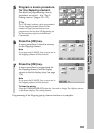
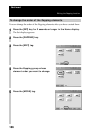
To set the skin or label of a Zapping element again
In step 3, press the [SKIN] tag to set the skin again or the [LABEL] tag to set the
label again, and press the Zapping element key whose skin or label you want to
change. Then set the letters again in the display for the skin or label setting, and
press the [OK] key.