CHAPTER 2: INSTALLATION 31
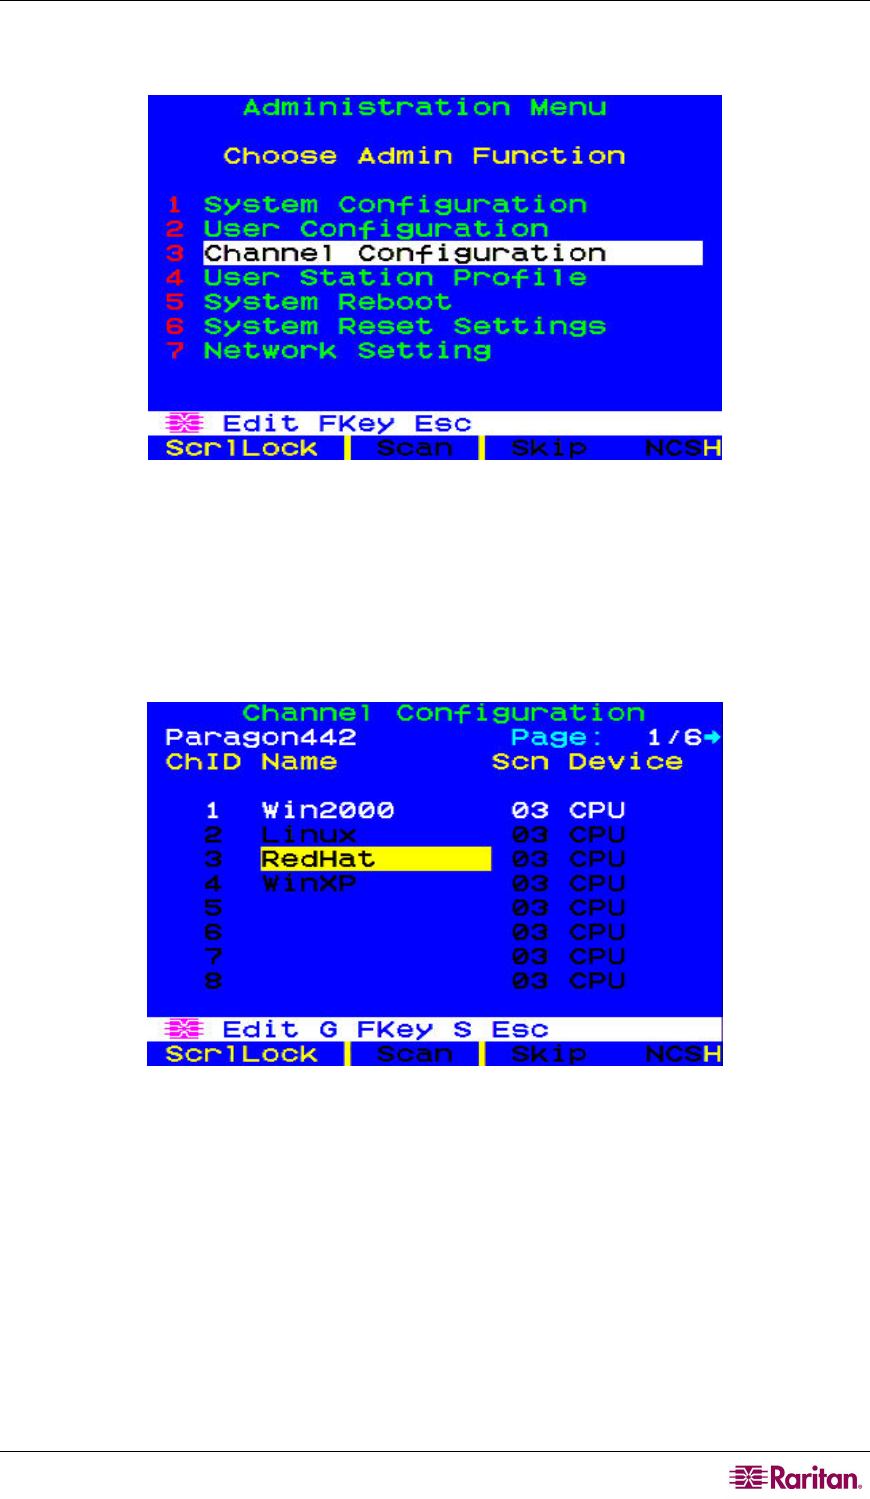
c. Press F5 to activate the Administration Menu. Use the Ç and È keys to move the
highlight to the Channel Configuration entry and press Enter to select it.
Figure 27 Administration Menu
d. The Channel Configuration menu appears. Use the Ç and È keys and Page Up and Page
Down keys to approach channel ports to which subsidiary Paragon switches are
connected. The port default device names appear in the Name column and the device
type in the Device column. (“P242” for a 2 x 42 switch [P2-UMT242], “P442” for a 4 x
42 switch [P2-UMT442], “P832” for an 8 x 32 switch [P2-UMT832M], or “P1664” for a
16 x 64 switch [P2-UMT1664M].
Figure 28 Channel Configuration Menu for a P2-UMT442
e. Continue using the Ç and È keys and Page Up and Page Down keys to move the yellow
highlight to the Name field for the channel port number where a subsidiary Paragon
switch is installed and press Enter. The highlight should turn light blue.
f. Type in the name you want to assign to the subsidiary Paragon switch on this channel
port (the highlight should turn green when you start typing). Press Enter when finished,
and then press S to save the new name. All other paths (channel ports) by which that
subsidiary Paragon switch is attached to the Paragon switch above it will be given the
same name automatically.
g. Press F2 to reopen the Selection Menu; make sure that the channel port(s) of the second-
tier Paragon switch are properly established. All paths to that Paragon switch should be
displayed in purple.


