82
Chapter 5
Watching Programs and Playing Discs
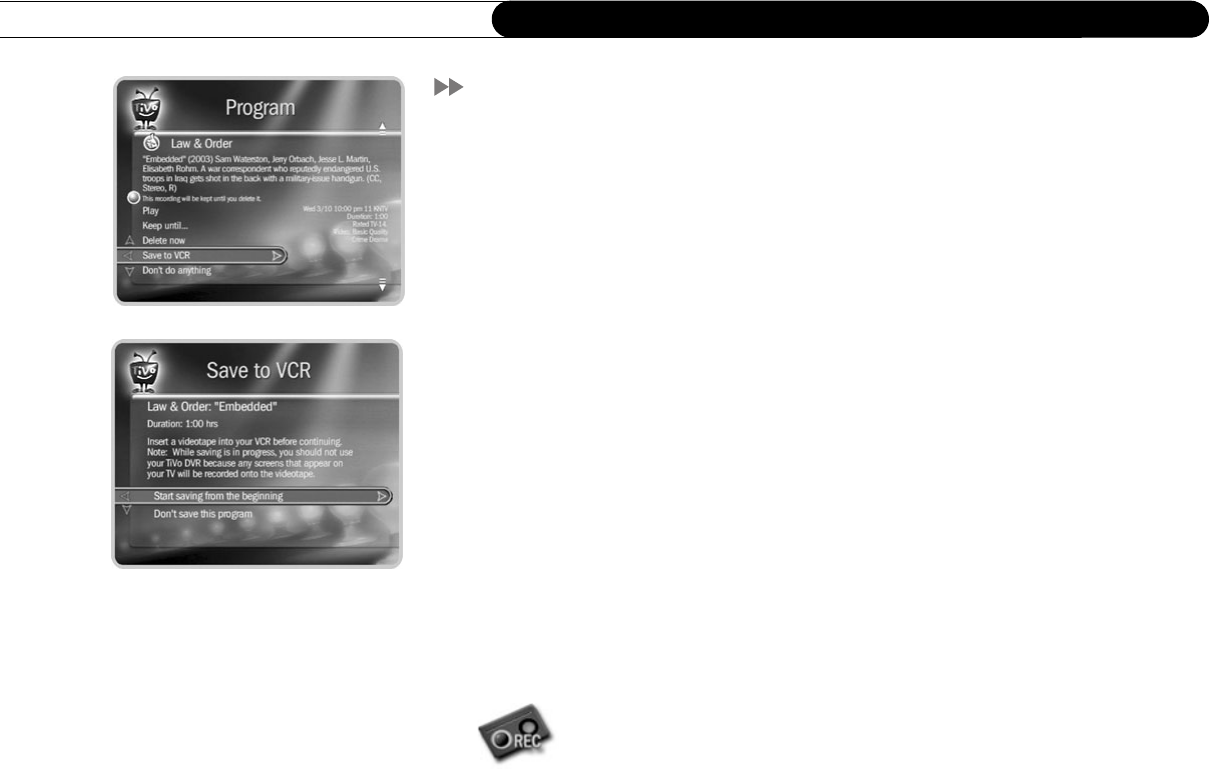
Save to VCR
If you have a VCR, you can save a program from Now Playing to a videotape. Saving to a
video tape happens in real time. For example, if a program is two hours long, it will take
two hours to save it. You will not be able to watch live TV or recordings while saving.
Most of the buttons on your remote that control live TV work as usual during Save to
VCR—you can fast forward through the boring parts! The VCR will record the video
exactly as it appears, including the status bar, channel banner, and any icons on the screen.
Using Save to VCR:
1. Connect a Composite A/V cable from the Recorder’s A/V Output jacks to the A/V
Input jacks your VCR. Your VCR’s A/V Output should already be connected to your
TV or A/V receiver (so you can watch video tapes). Make sure your TV or
A/V receiver is set to display video from your VCR.
2. Set the VCR to record input from your Recorder (see your VCR’s instructions for how
to set its input), and insert a videotape.
3. Go to Now Playing, highlight the show you want to save, then press SELECT.
4. Select Save to DVD or VCR, then Save to VCR.
5. Select “Start saving from the beginning.”
6. A title screen appears for ten seconds. When you see it, press your VCR’s record
button. When the program is over, press stop on your VCR.
You can cancel saving by pressing the LIVE TV or TiVo button on your
remote. A videotape icon appears as a warning. Press the same button again
and a confirmation screen appears giving you the option to resume saving at a
later time, or cancel saving to VCR. If you choose to cancel saving, be sure to press stop
on your VCR as well.


