


100 C2630M-C (7/09)
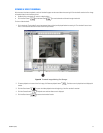
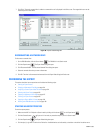
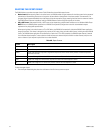
7. Do the following:
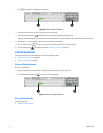
a. In the Device panel, click the check box of the desired export device.
b. Click the check box for each time range you want to export.
8. Click Export.
Figure 64. Selecting the Export Device and Time Ranges
INSERTING AND REMOVING A USB FLASH DRIVE
The DX8100 supports both USB 1.1 and USB 2.0 flash drives. To ensure data is not lost or corrupted when exporting data to a USB flash drive,
follow the steps listed in Removing a USB Flash Drive on page 100.
This section describes how to insert and remove a USB device and includes the following topics:
• Installing a USB Flash Drive on page 100
• Removing a USB Flash Drive on page 100
INSTALLING A USB FLASH DRIVE
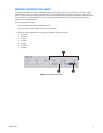
This section describes how to install a USB flash drive. To install a USB flash drive into the DX8100:
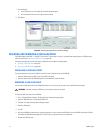
1. Insert the USB drive into the USB 2.0 port on the HVR’s front panel.
2. Wait five seconds while the DX8100 recognizes and automatically installs the device.
REMOVING A USB FLASH DRIVE
You can remove a USB device within the DX8100 environment. In this case, you do not have to exit to the Windows environment.
To remove the USB flash drive from the DX8100:
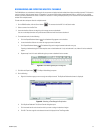
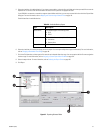
1. Click > File Unplug/Eject Hardware. The Unplug or Eject Hardware dialog box opens.
2. Select the USB flash drive in the Hardware devices list.
3. Click Stop. The Stop a Hardware device dialog box opens.
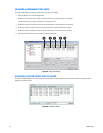
4. Select the USB device.
5. Click OK.
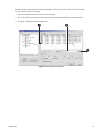
6. Wait for the DX8100 to respond with a message stating that it is safe to remove the USB device from the DX8100. Removing a USB flash
drive before the DX8100 acknowledges that it is safe to do so, might result in lost or corrupted data.
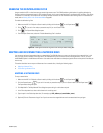
7. Remove the USB flash drive.
WARNING: Improperly removing a USB drive can cause data to be lost or corrupted.