


38 C2630M-C (7/09)
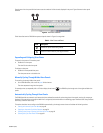
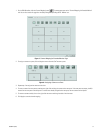
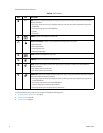
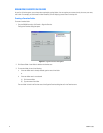
Table M describes the Site Tree parts.
This section describes how to work with the Site Tree and includes the following topics:
• Assigning Cameras to View Panes on page 39
• Setting Up Links on page 39
• Removing Links on page 40
Table M. Site Tree Parts
Item Part Description
Name Site: Expands and collapses the DX8100 site. Right-clicking the site name opens a shortcut menu that provides the
following commands:
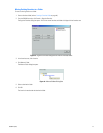
• User Log-In: opens the User Log-In dialog box, where you enter your user name and password to log into the
DX8100 site.
• User Log-Out: Logs you out of the DX8100 site.
• Connect
• Disconnect
Camera: Expands and collapses the Camera tree.
Channel information: Displays icons that represent the configuration of the camera:
• Recording mode
• Recording resolution
• Recording frame rate
• Recording image quality
Alarm: Expands and collapses the Alarm tree.
ATM/POS: Expands and collapses the ATM/POS tree.
Relay: Expands and collapses the Relay tree. Right-clicking a relay opens a shortcut menu that provides the
following commands:
• ON: Allows you to turn on the relay.
• OFF: Allows you to turn off the relay.
Remote site: Expands and collapses the remote DX8100 site. Right-clicking the remote site name opens a shortcut
menu that provides the following commands:
• User Log-In: Opens the User Log-In dialog box, where you enter your user name and password to log into the
remote DX8100 site.
• User Log-Out: Logs you out of the remote DX8100 site.
• Connect: Allows you to connect to the remote site.
• Disconnect: Allows you to disconnect from the remote site.