


C2630M-C (7/09) 115
UNDERSTANDING THE SETUP DIALOG BOX
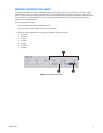
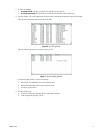
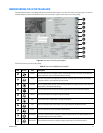
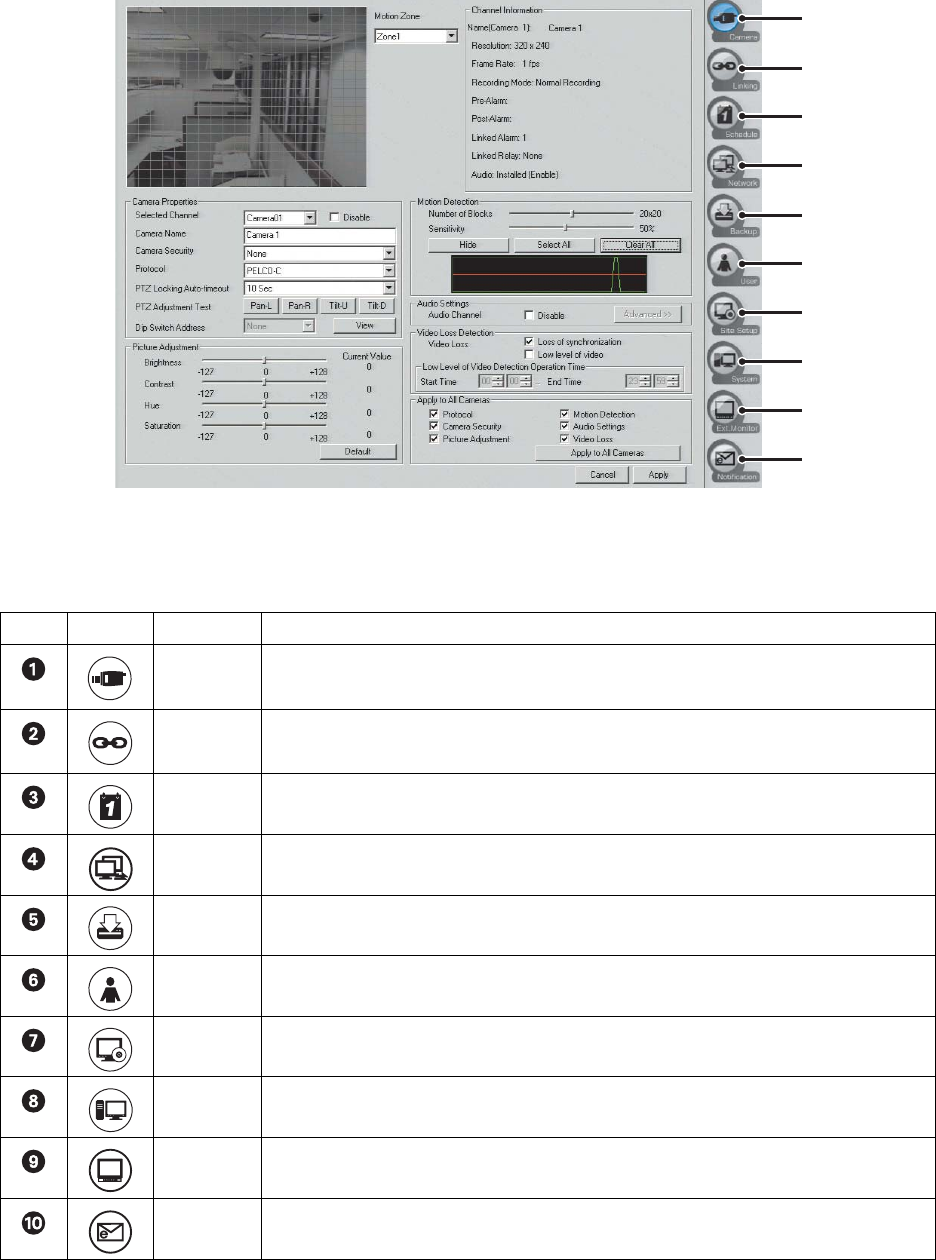
The Setup dialog box opens in the DX8100 view panel to the default Camera page. You can only view video in the Camera page. You must exit
the Setup dialog box to access the DX8100 functions in the main window. Figure 81 shows the parts of the Setup dialog.
Figure 81. Parts of the DX8100 Setup Dialog Box
Table AC describes the parts of the Setup dialog.
Table AC. Parts of the DX8100 Setup Dialog Box
Item Button Part Description
Camera Click the Camera button to configure cameras. Available options are PTZ functions, motion detection,
picture adjustment, audio, and video loss detection settings.
Linking Click the Linking button to configure relays and alarms, associate relays and alarms with cameras,
link relays to alarms, and link cameras to other cameras.
Schedule Click the Schedule button to build custom recording schedules, set image resolution, frame rate, and
image quality, and configure relay settings.
Network Click the Network button to set up the network configuration and communication port settings.
Backup Click the Backup button to configure and perform backups.
User Click the User button to add, delete, or change user accounts.
Site Click the Site Setup button to add, delete, and configure additional DX8100 Series HVRs.
System Click the System button to set up additional system options.
Ext. Monitor Click the Ext. Monitor button to configure an additional display monitor. (This button appears only if
the optional display card has been installed.)
Notification Click the Notification button to configure emergency agent and e-mail notification options.
ᕡ
ᕢ
ᕣ
ᕤ
ᕥ
ᕦ
ᕧ
ᕨ
ᕩ
ᕫᕾ