


C2630M-C (7/09) 133
Configuring Basic Relay Operating Properties
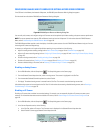
To configure basic relay operating properties:
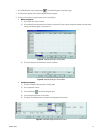
1. On the DX8100 toolbar, click the Setup button . The Setup dialog opens to the Camera page.
2. Click the Linking button to display the Link page.
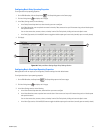
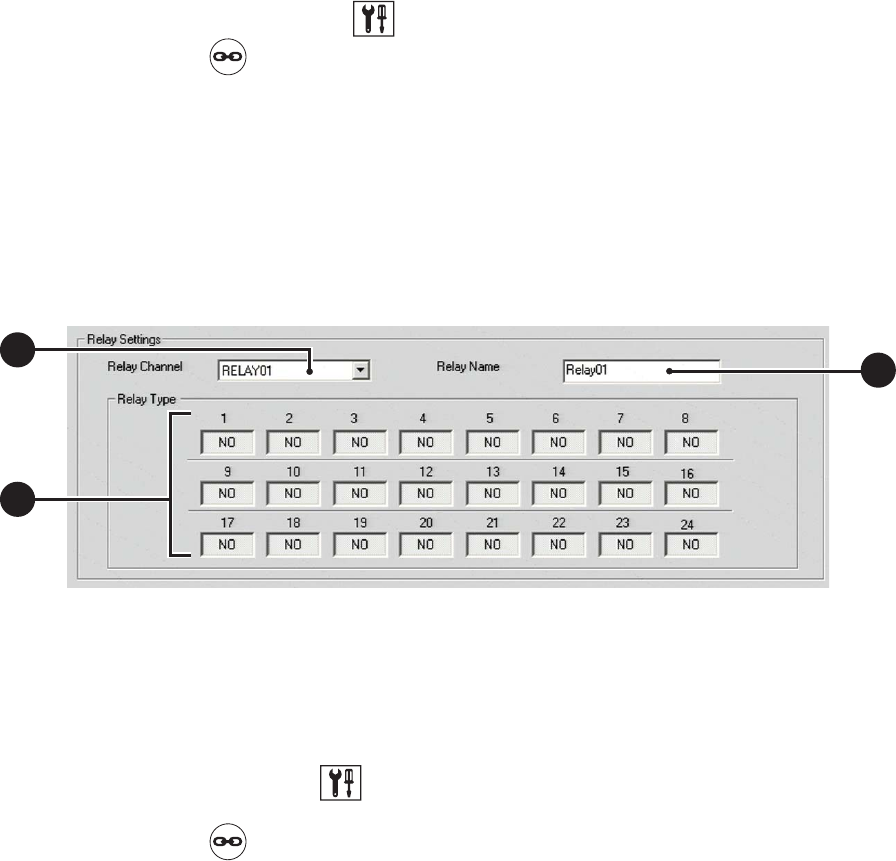
3. In the Relay Settings section, do the following:
a. In the Relay Channel drop-down box, select the relay you want to configure.
b. In the Relay Name box, enter an optional new name for the relay. Relay names can be up to 32 characters long and can include spaces
and special characters.
You can also rename sites, cameras, alarms, and relays from the Site Tree by slowly clicking twice on each object’s name.
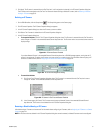
c. In the Relay Type section, click the NO/NC button to toggle the default output type for each relay (normally open or normally closed).
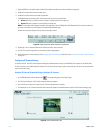
4. Click Apply.
Figure 104. Relay and Alarm Settings Page: Relay Settings Section
Configuring Basic Alarm Input Operating Properties
Most applications will not require you to change relay and alarm settings from their default states.
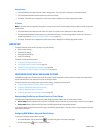
To configure basic alarm input operating properties:
1. On the DX8100 toolbar, the Setup button . The Setup dialog opens to the Camera page.
2. Click the Linking button to display the Link page.
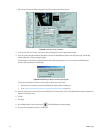
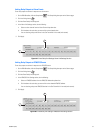
3. In the Alarm Settings section, do the following:
a. In the Alarm Channel drop-down box, select the Alarm you want to configure.
b. In the Alarm Name box, enter an optional new name for alarm. Alarm names can be up to 32 characters long and can include spaces
and special characters.
You can also rename sites, cameras, alarms, and relays from the Site Tree by slowly clicking twice on each object’s name.
c. In the Alarm Type section, click the NO/NC button to toggle the default output type for each alarm (normally open or normally closed).
3
b
3c
3c
3a
3a