


C2630M-C (7/09) 49
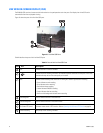
Table O describes the recording indicators.
This section describes how to start and stop instant recording and includes the following topics:
• Starting Instant Recording
• Stopping Instant Recording
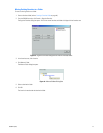
Starting Instant Recording
To start instant recording:
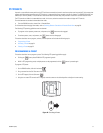
• Double-click the Instant Recording icon located in the lower-right corner of the view pane.
– The Instant Recording icon changes from silver to blue, indicating that instant recording is activated.
– If video recording is enabled, verify that REC is black and highlighted white. If video recording is not enabled, REC is not displayed or
will show another recording mode color.
Stopping Instant Recording
To deactivate instant recording:
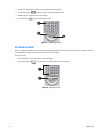
• In the view pane, double-click the Instant Recording icon.
The instant recording icon changes from blue to silver, indicating that instant recording is de-activated.
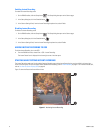
LISTENING TO LIVE AUDIO AT THE SERVER
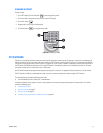
1. On the DX8100 toolbar, click the Live button .
2. Drag a camera that is configured to record live audio from the Site Tree onto a view pane.
NOTE: Live audio recording is not supported for IP cameras.
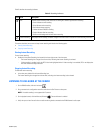
3. On the playback control, click the Mute on/off button . The sound feature is enabled.
4. Verify that you can hear live audio from an audio monitoring device connected to the DX8100 server’s audio output.
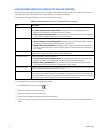
Table O. Recording Indicators
Item Icon Description
REC Indicates camera recording mode and status. A blinking REC indicator signifies event recording.
• Green indicates normal recording.
• Blue indicates motion recording.
• Red indicates alarm recording.
• Yellow indicates ATM/POS recording.
• Purple indicates video loss recording.
• Black on white background indicates instant recording.
Instant Recording Starts/stops instant recording if enabled. Changes from silver to blue to indicate that instant recording is activated.