


180 C2630M-C (7/09)
Setting Up RS-422/RS-485 Communication Port Properties
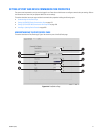
The DX8100 interfaces with the KBD300A, ATM/POS, and third-party dome devices using Port 1 to Port 4. All ports are compatible with both
RS-422 or RS-485 serial data communication standard. This setting describes how to connect a device to the DX8100 using Port 1 to Port 4.
Access the Network page to configure Port 1 to Port 4 communication properties. For information about accessing the Network page, refer to
Setting Up DX8100 Network Access on page 168. For information about the Port/Device page, refer to Setting Up Port and Device
Communication Properties on page 177.
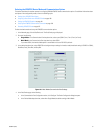
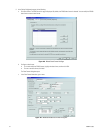
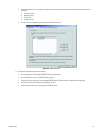
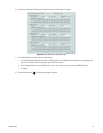
To configure Port 1 to Port 4 properties:
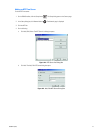
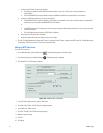
1. In the Network page, click the Port/Device tab. The Port/Device page is displayed.
2. In the Communication Port drop-down box, select the port number you want to configure.
3. In the device drop-down box, select a device.
ATM/POS devices can use COM1 and Port 1 to Port 4. The KBD300A and third-party dome devices use Port 1 to Port 4. For information
about interfacing ATM/POS devices to the DX8100 using COM1, refer to Setting Up COM1 Port Properties on page 179.
4. Configure the following port settings using the drop-down box.
• Interface mode
• Baud rate
•Parity
• Data bits
• Stop bits
5. Click Apply.
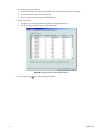
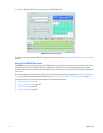
SETTING UP ATM/POS DEVICE PROPERTIES
The DX8100 allows you to connect up to 16 ATM/POS devices and provides 2 ATM/POS device modes:
• Single Mode: Use this option to connect up to 4 ATM/POS devices to the DX8100.
• Multi Mode: Use this option to connect up to 16 ATM/POS devices to the DX8100 over one serial connection.
Single Mode and Multi Mode can be combined to connect up to 16 ATM/POS devices to the DX8100. For information about installing the
ATM/POS equipment for each mode, refer to the DX8100 Installation manual.
This section describes how to configure ATM/POS device properties and includes the following topics:
• Selecting the ATM/POS Device Mode and Communications Options
• Setting Up an ATM/POS Data Format
• Assigning a Data Format to an ATM/POS Device on page 190
• Setting Up ATM/POS Exceptions on page 191
• Verifying the ATM/POS Communication Connection on page 196
• Recording ATM/POS Events on page 197