


198 C2630M-C (7/09)
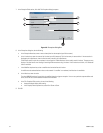
2. Setup a camera to record the ATM/POS events:
a. Set up the designated ATM/POS camera for scheduled ATM/POS recording.
b. Configure the ATM/POS link settings.
c. Configure the ATM/POS record link settings.
d. (Optional) Configure the ATM/POS PTZ link settings.
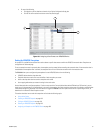
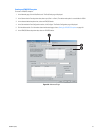
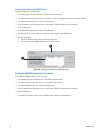
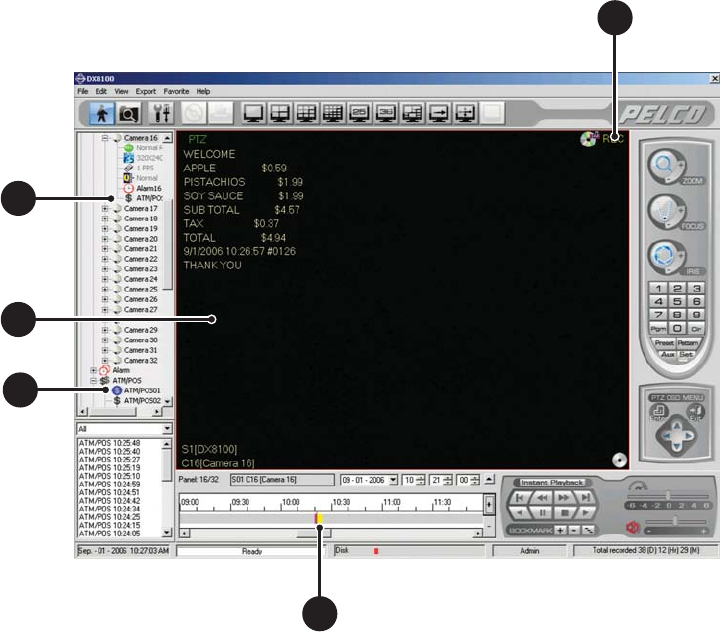
3. In the DX8100 application window, do the following:
a. Assign a camera to a view pane.
b. Assign the ATM/POS device to the camera designated to record ATM/POS events.
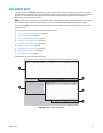
4. Verify the following:
a. The POS record indicator is yellow and flashing.
b. The ATM/POS record symbol flashes blue during an ATM/POS event.
c. The ATM/POS events are displayed yellow in the time line.
Figure 158. Recording ATM/POS Transaction
SETTING UP THE KBD300A KEYBOARD
The KBD300A allows you to operate certain DX8100 live view display functions and control camera PTZ operations from a keyboard rather than a
mouse.
When connected to the DX8100 server, the KBD300A supports two modes: standard and shift mode. Shift mode is entered by pressing the Shift
button and is indicated by a lit Shift button LED. For information about how to operate the KBD300A, refer to the KBD300A universal keyboard
Installation/Operation manual. For information about using the KBD300A, refer to Using the KBD300A Keyboard on page 66.
In summary, the steps required to set up the KBD300A for operation are as follows:
• Connect the KBD300A to the DX8100: For information about connecting the KBD300A to the DX8100, refer to the DX8100 Installation
manual.
4
b
3a
3a
4a
4a
3
b
4c