3.
Fill in the appropriate circles on the Photo Index Sheet.
Fill in the appropriate circles with a dark pencil or a black ink pen to select photos to print and the print settings.
Good
Bad
(A) Check mark
(B) Line only
(C) Too light
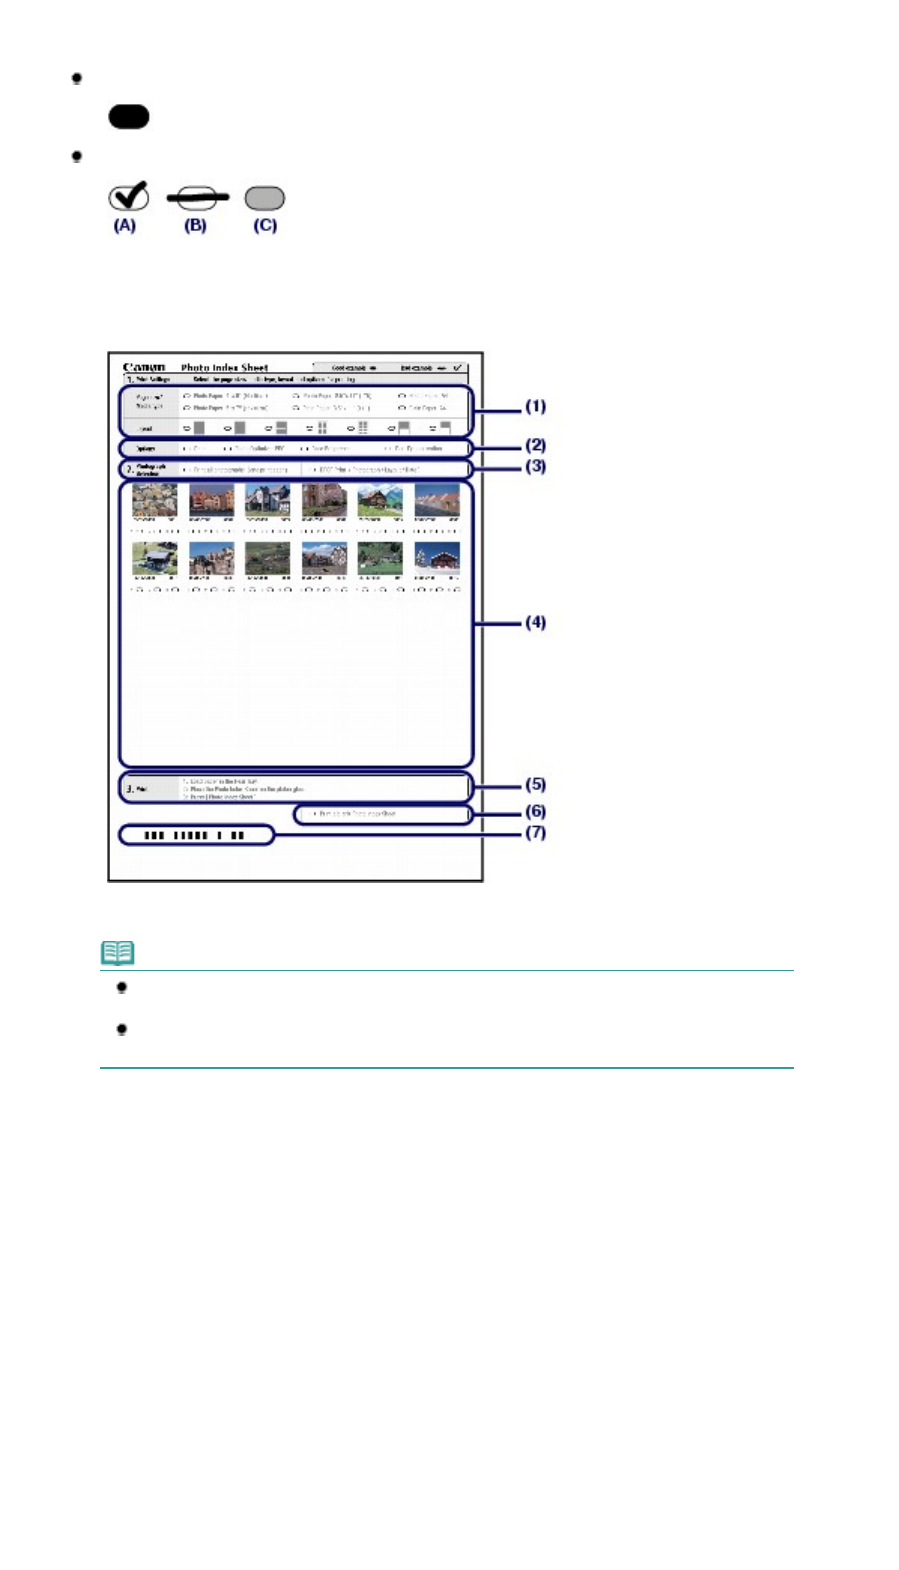
(1)
Select the page size, media type, and layout.
Note
When printing photos using the Photo Index Sheet, you can select 4" x 6" (10 x 15 cm), 5"
x 7" (13 x 18 cm), 8.5" x 11" (LTR), or A4 for the page size.
When you select Plain Paper 8.5" x 11" (LTR) or Plain Paper A4 in Page size/Media type,
photos are printed with borders even if you select the borderless print in Layout.
(2)
Select Date / Photo Optimizer PRO / Face Brightener / Red-Eye correction as
necessary.
(3)
Fill in the circle of Print all photographs to print a copy of all photos.
* If you filled in this circle, any other circles you have filled in for the number of copies to print for each
photo will be disregarded, and only one copy each of all photos will be printed.
Fill in the circle of DPOF Print to print according to the DPOF settings on the digital camera, such as photos
to print, date, and layout settings.
* You can specify the Standard Print, Multi-Image Print, or Index Print in the DPOF settings. Available layouts
or image correction options are different depending on each print setting. For details, refer to the on-screen
manual:
dvanced Guide
.
(4)
Select the number of copies (fill in a circle under each photo to print).
(5)
Confirm and follow the described printing procedure.
(6)
Fill in this circle to print the same Photo Index Sheet again.
* If you filled in this circle, all other settings will be disregarded.
(7)
Be sure not to stain the bar-code.
* If the bar-code gets stained or wrinkled, the Photo Index Sheet may not be scanned properly.
Page 15 of 628 pagesPrinting Photos Saved on the Memory Card


