


Note
If you scan without preview, colors are adjusted based on the document type selected in Select
Source.
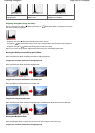
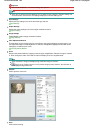
When using the machine for the first time, scanner calibration starts automatically. Wait a while
until the preview image appears.
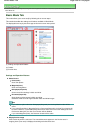
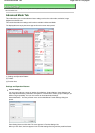
Destination
Select what you want to do with the scanned image.
Print (300 dpi)
Select this to print the scanned image on a printer.
Image display (150 dpi)
Select this to view the scanned image on a monitor.
OCR (300 dpi)
Select this to use the scanned image with OCR software.
OCR software is software that converts text scanned as an image into text data that can be
edited in word processors and other programs.
Note
To scan at 301 dpi or higher, scan in Advanced Mode after setting the Output Resolution.
See "Scanning in Advanced Mode
" to scan in Advanced Mode.
Output Size
Select an output size.
Output size options vary by the item selected in Destination.
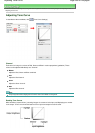
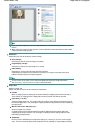
Flexible
When a cropping frame is displayed, the portion within the cropping frame will be scanned at
100%. When no cropping frame is displayed, the entire Preview area will be scanned.
Paper Size (L, A4, etc.)
Select an output paper size. The portion within the cropping frame will be scanned at the size of
the selected paper size. You can drag the cropping frame to enlarge/reduce it while maintaining
the aspect ratio.
Monitor Size (1024 x 768 pixels, etc.)
Select an output size in pixels.
A
cropping frame of the selected monitor size will be displayed and the portion within the
cropping frame will be scanned. You can drag the cropping frame to enlarge/reduce it while
maintaining the aspect ratio.
Add/Delete...
Click to open the Add/Delete the Output Size dialog box, in which you can save custom output
sizes. You can select this option when Destination is Print (300 dpi) or Image display (150 dpi).
Page 460 of 628 pagesBasic Mode Tab