


Advanced Guide
Troubleshooting
Contents
>
Scanning > Saving Scanned Data
Saving Scanned Data
This section describes the operation to scan originals and save them on the memory card in PDF format
(MP260 series) or save them on the computer using the Operation Panel on the machine.
For the operation on scanning from the computer, refer to the on-screen manual:
A
dvanced Guide
. You
can find the detailed procedures to scan images or print scanned images with various settings, such as
image correction.
Important
We recommend that you make a backup of the data on the memory card regularly and save it on
other storage media, in case of accidental loss.
Please note that Canon shall not be liable for any damage or loss of the data for any reason
whatsoever, even within the warranty period of the machine.
Saving Scanned Data on the Memory Card (MP260 series)
1.
Prepare for scanning.
(1)
Turn on the power.
See
Operation Panel
.
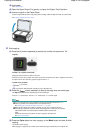
(2)
Insert a memory card into the Card Slot.
For the types of memory cards you can use and locations to insert them, see
Inserting the Memory Card.
Note
When the read/write attribute of the Card Slot is set to the "Writable from PC" mode, you
cannot save scanned data on a memory card. Set the read/write attribute to the "Not
writable from PC" mode. See Setting the Read/Write Attribute of the Card Slot
.
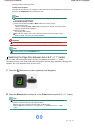
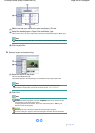
2.
Load an original on the Platen Glass.
See Loading Originals to Copy or Scan
.
Note
The size of original that can be scanned is either A4 or 8.5" x 11" (Letter) depending on the
country or region of purchase.
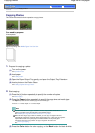
3.
Press and hold down the
SCAN
button for 2 or more seconds to start scanning.
The LED flashes once.
The scanned data will be saved on the memory card in PDF format.
Important
Do not open the Document Cover or move the loaded original until scanning is completed.
Do not remove the memory card or turn off the power while the machine is operating.
The scanned data will be saved in the folder "CANON_SC" on the memory card. You cannot
print the saved data using the Operation Panel on the machine.
Note
If you press the
SCAN button for less than 2 seconds, the scanned data will be saved on the
computer.
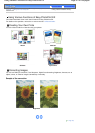
You can correct/enhance or print image data saved on the memory card, using MP Navigator
EX supplied with your machine. For details, refer to the on-screen manual:
A
dvanced Guide
.
To remove the memory card after scanning is completed, see
Removing the Memory Card
.
Page 34 of 628 pagesSaving Scanned Data