Note
Effect levels can be changed using the slider below Digital Face Smoothing.
Click
(Compare) to display the images before and after the enhancement side by side so
that you can compare and check the result.
Click Reset Selected Image to undo the enhancement operation.
If you want to apply the enhancement to all the selected images at once, select the Apply to all
images checkbox.
Manual Enhancement
3.
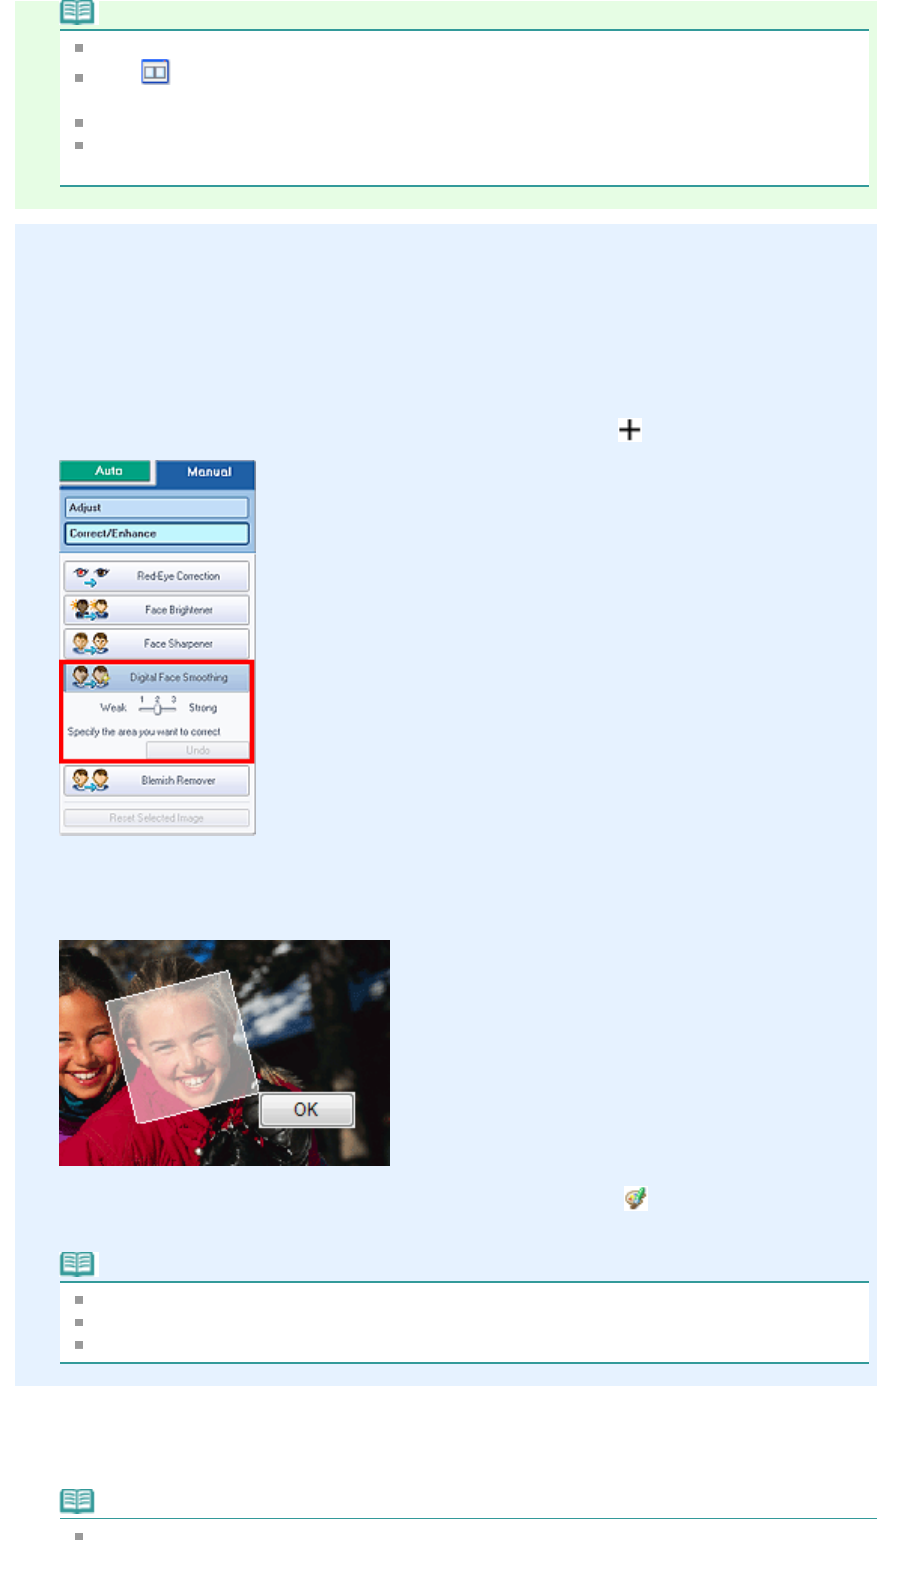
Click Manual, then click Correct/Enhance.
4.
Click Digital Face Smoothing.
Move the cursor over the image. The shape of the cursor changes to
(Cross).
5.
Drag to select the area you want to enhance, then click OK that appears over the
image.
Skin in and around the selected area is enhanced beautifully and the (Correction/Enhancement)
mark appears on the upper left of the image.
Note
You can also drag to rotate the rectangle.
Click Undo to undo the preceding enhancement operation.
Effect levels can be changed using the slider below Digital Face Smoothing.
6.
Click Save Selected Image or Save All Corrected Images.
You can save enhanced images as new files.
Note
To save only the image you like, click Save Selected Image. To save all images, click Save All
Corrected Images.
Page 166 of 628 pagesUsing the Digital Face Smoothing Function


