


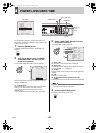

COPY MENU SETTINGS7
English 137
Use the following procedure to copy recording area settings.
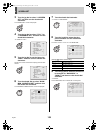
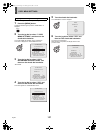
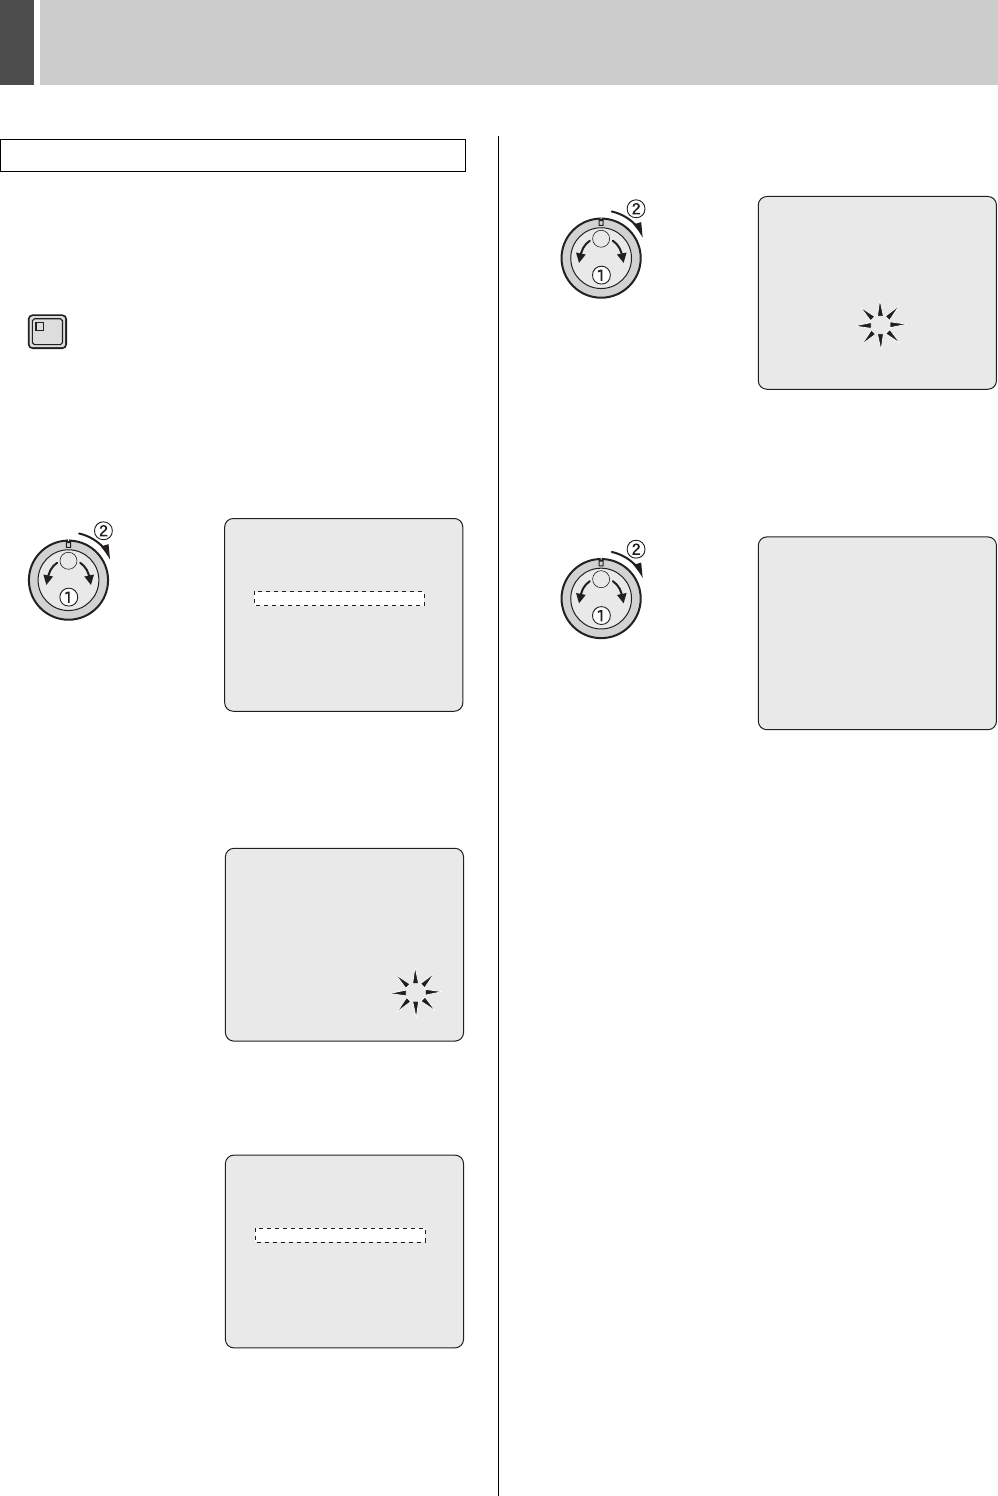
1 Press the [MENU] button.
The MENU indicator lights up and the <MAIN MENU> is
displayed.
2 Turn the jog dial to select “7.COPY
MENU SETTINGS” and then turn the
shuttle dial clockwise.
The <COPY MENU SETTINGS> screen is displayed.
The cursor is displayed on “SAVE MENUS TO CF”.
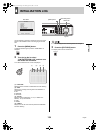
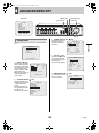
3 Turn the jog dial to select “COPY
RECORDING AREA SETTINGS” and
then turn the shuttle dial clockwise.
“NO” flashes.
4 Turn the jog dial to select “YES” and
then turn the shuttle dial clockwise.
The cursor appears on “SAVE MENUS TO CF”.
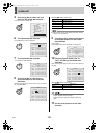
5 Turn the shuttle dial clockwise.
The <WARNING> screen is displayed.
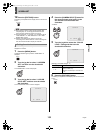
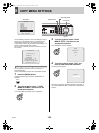
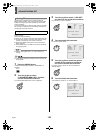
6 Turn the jog dial to select “YES” and
then turn the shuttle dial clockwise.
The copying process begins.
When copying is completed, the display returns to the
previous screen.
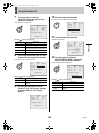
Copying the recording area settings
MENU
<COPY MENU SETTINGS>
DVR TYPE VER. SA16-04.00
SAVE MENUS TO CF ->
LOAD MENUS FROM CF ->
COPY USER ID SETTIGS : NO
COPY RECORDING AREA SETTINGS : NO
*IF YOU CHOOSE ^YES^ FOR ^AREA SETTINGS^,
HARD DISK WILL BE INITIALIZED !
<COPY MENU SETTINGS>
DVR TYPE VER. SA16-04.00
SAVE MENUS TO CF ->
LOAD MENUS FROM CF ->
COPY USER ID SETTINGS : NO
COPY RECORDING AREA SETTINGS : NO
*IF YOU CHOOSE ^YES^ FOR ^AREA SETTINGS^,
HARD DISK WILL BE INITIALIZED !
<COPY MENU SETTINGS>
DVR TYPE VER. SA16-04.00
SAVE MENUS TO CF ->
LOAD MENUS FROM CF ->
COPY USER ID SETTIGS : NO
COPY RECORDING AREA SETTINGS : YES
*IF YOU CHOOSE ^YES^ FOR ^AREA SETTINGS^,
HARD DISK WILL BE INITIALIZED !
<WARNING>
SAVE MENUS TO CF!!
CONTINUE?
NO
<COPY MENU SETTINGS>
SAVING FINISHED!!
SAVE MENUS TO CF ->
LOAD MENUS FROM CF ->
COPY USER ID SETTINGS : NO
COPY RECORDING AREA SETTINGS : NO
*IF YOU CHOOSE ^YES^ FOR ^AREA SETTINGS^,
HARD DISK WILL BE INITIALIZED !
e00_l8hbd_xe_7.book Page 137 Tuesday, April 5, 2005 11:41 AM