


200 English
INTRODUCTION SETTINGS NETWORK
CONTROL
NETWORK
OPERATION
NETWORK
SETTINGS
OTHEROPERATION
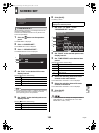
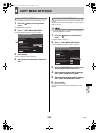
8 COPY MENU SETTINGS
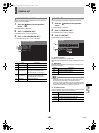
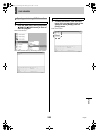
Use the following procedure to save menu settings to a PC.
1 Click the button on the operation
panel.
The “MAIN MENU” is displayed.
2 Click “7. COPY MENU SETTINGS”.
The “COPY MENU SETTINGS” screen is displayed.
3 Click [SAVE].
The save confirmation dialog is displayed.
4 Specify the save destination folder and
save.
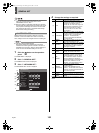
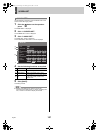
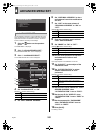
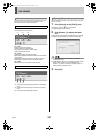
Load menu settings saved on a computer to the digital video
recorder.
Also set whether to load user ID settings (JP.191) or network
settings (JP.193).
z Recording area settings (JP.78) can also be loaded but
hard disk initialization is required.
1 Click the button on the operation
panel.
The “MAIN MENU” is displayed.
2 Click “7. COPY MENU SETTINGS”.
The “COPY MENU SETTINGS” screen is displayed.
3 Click the [BROWSE] button and specify
the file that the menu is saved in.
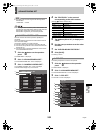
4 Select whether to load user ID settings
with “COPY USER ID SETTINGS”.
5 Select whether to load network settings
with “COPY NETWORK SETTINGS”.
6 Click [LOAD].
The loading process begins.
The network is disconnected and the digital video recorder
restarts.
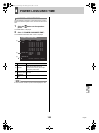
SAVING MENU SETTINGS
COPY MENU SETTINGS
DVR TYPE VER. : SA16-04.00
SAVE MENUS TO PC
LOAD MENUS FROM PC
SAVE
LOAD
LOAD FILE :
COPY USER ID SETTINGS :
COPY RECORDING AREA SETTINGS :
COPY NETWORK SETTINGS :
BROWSE
NO
NO
NO
3
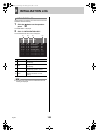
LOADING MENU SETTINGS
COPY MENU SETTINGS
DVR TYPE VER. : SA16-04.00
SAVE MENUS TO PC
LOAD MENUS FROM PC
SAVE
LOAD
LOAD FILE :
COPY USER ID SETTINGS :
COPY RECORDING AREA SETTINGS :
COPY NETWORK SETTINGS :
BROWSE
NO
NO
NO
3
e00_l8hbd_xe_7.book Page 200 Tuesday, April 5, 2005 11:41 AM