174 English
INTRODUCTION SETTINGS NETWORK
CONTROL
NETWORK
OPERATION
NETWORK
SETTINGS
OTHEROPERATION
4 SAVING (COPYING) RECORDED VIDEO
Use the following procedures to copy recorded images to the
archive area on the hard disk or to download images to a PC
or the like.
These functions can be used to save important images from
the recording areas.
z In certain cases where network-busy is detected as a result
of the operating environment, the network may be forcibly
disconnected in order to protect DVR recording operations.
Furthermore, the network is forcibly disconnected in
response to commands to send a large amount of data in a
single operation (in particular, when 100 images or more
are to be saved), and in this case, the number of images
should be limited based on the hardware configuration in
question.
z When the archive area becomes full of images, download
these images to a CompactFlash card or other storage
media and click [AREA FULL RESET] from the recording
area settings on the “MAIN MENU.” (JP.181)
z Can only save in full screen display. Cannot save for quad-
screen or multi screen display.
z Copied data is stored one image at a time. Moving images
can be copied by setting the number of images required
from the first copied image.
z In a single copy operation, a maximum of 10,000 images
can be copied to the archive area and a maximum of
40,000 images can be downloaded to a PC.
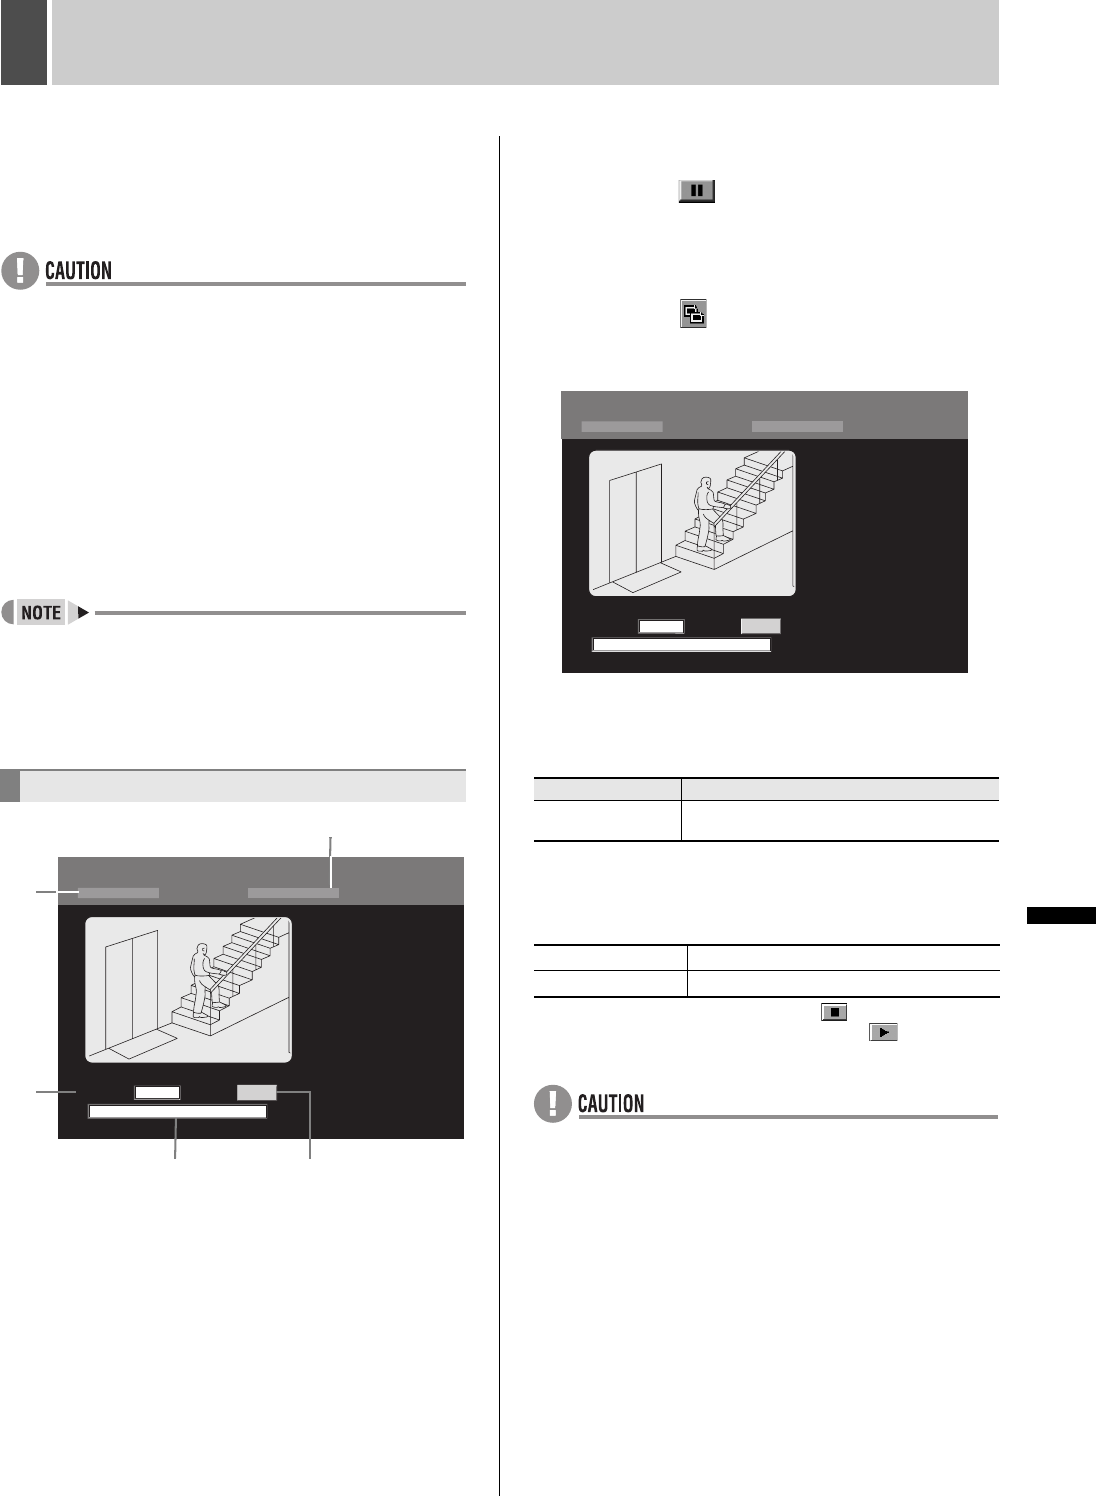
(1) Recorded date/time: Recorded date and time for the
image currently being played back
(2) PLAYBACK AREA:
Area in which the image currently being played back is
recorded
(3) HOW MANY: Setting for the number of images to be
stored
(4) Message box: Displays the copying status.
(5) [START]: Starts copying.
1 Play an image from a recording area.
2 Click the button on the operation
panel at the start of the image to be
copied.
Playback of the image is paused.
3 Click the button on the operation
panel.
The “COPY” screen is displayed.
4 Enter the number of images for “HOW
MANY”.
[Settings] ( indicates default setting)
5 Click [START].
Copying to the archive area begins and the message box
displays the current copying status.
When copying is completed, click the button on the
PLAYBACK area to display live video or the button to
display playback video.
z The “COPY” screen cannot be displayed when playing
video from the archive area.
Copying to the archive area
COPY
COPY TO ARCHIVE AREA ON THE RECORDER
01-01-05 00:00: 00
PLAYBACK AREA
HOW MANY:
PICTURES
NORMAL
START
1
01
(4)
(1)
(2)
(3)
(5)
Setting Description
1 - 10000
Specifically, indicate the number of images
to be copied beginning with the start image.
Copying “COPYING TO ARCHIVE AREA!”
Copying completed “COPY FINISHED!”
COPY
COPY TO ARCHIVE AREA ON THE RECORDER
01-01-05 00:00: 00
PLAYBACK AREA
HOW MANY:
PICTURES
NORMAL
START
1
01
e00_l8hbd_xe_7.book Page 174 Tuesday, April 5, 2005 11:41 AM