96 C624M-C (5/06)
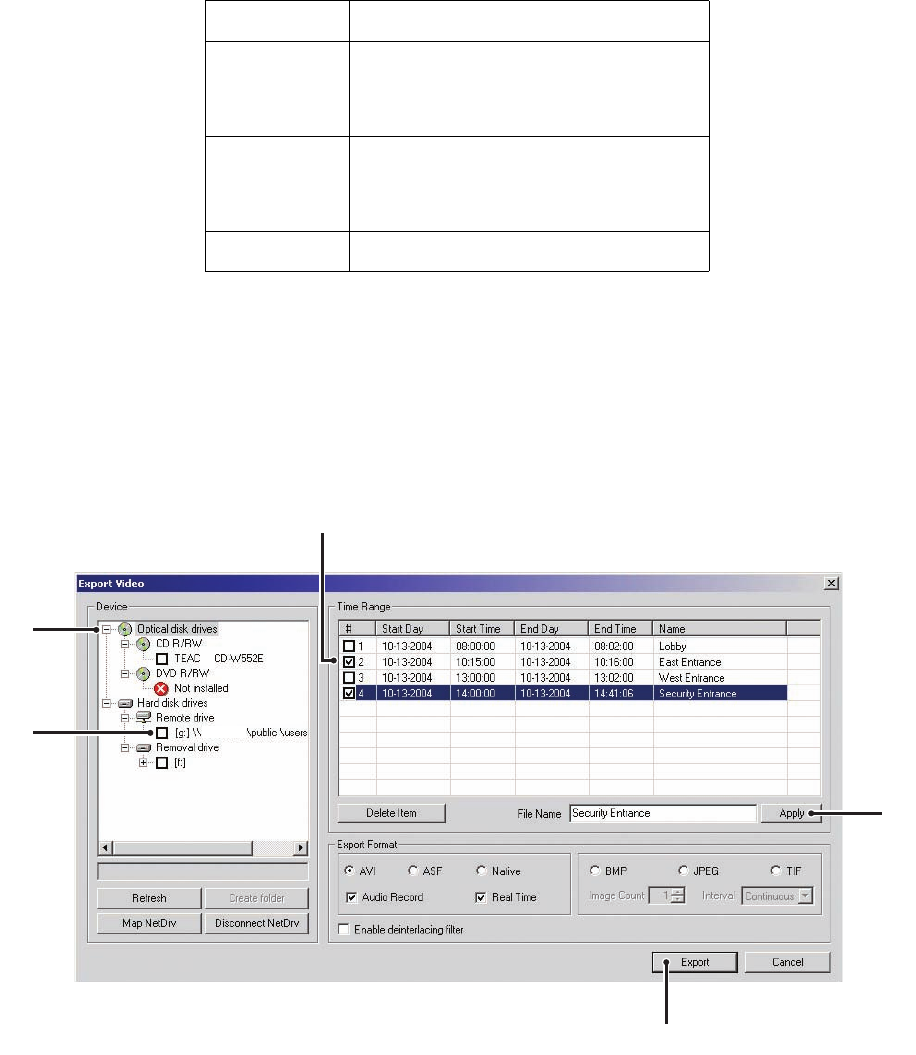
5. Select the check box of the desired device. If you choose a remote device, select the drive and folder path where you would like to store the
exported file. You can also click the Browse button to access the file system for the appropriate folder.
If your DX8000 is connected to a network that supports shared folders and drives, you can map a network drive from within the Export Video
dialog box. For more information, refer to Mapping and Disconnecting a Network Drive on page 94.
The following table shows a listing of available devices.
6. Select the check box of the video time range you want to export. You can export multiple time ranges simultaneously. For more information,
refer to Changing a Bookmarked Time Range on page 97.
7. Click in the File Name box, and then type the file name for each selected video time range. You can accept the default file name assigned to
the time range. For more information, refer to Assigning a Custom Export Video File Name on page 97.
8. Select the export format. For more information, refer to Selecting the Export Format on page 98.
9. Click Export.
Figure 64. Exporting Selected Video
Table AA. Available Backup Space
Type Description
Optical drives The DX8000 supports the following drives:
•CD-R
•DVD-R
Hard disk drives The hard disk drive can be any of the following:
• Local drives
• Remote drives
Removable drives USB flash drives
10.0.1.14
ᕦ
ᕧ
ᕥ
ᕤ
ᕨ
