Upgrading the S8300A
Issue 9.1 June 2006 621
Replacing the S8300A with the S8300B Media Server
To remove the S8300A and insert the S8300B
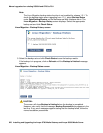
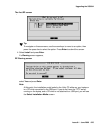
1. On the Maintenance Web Interface, under Server select Shutdown Server.
2. Select the Delayed Shutdown option and uncheck the "Restart server after shutdown,"
checkbox.
3. Click the Shutdown button.
Click OK to confirm.
4. When the OK to Remove LED on the S8300 faceplate goes on steady, it is safe to remove
the S8300.
!
CAUTION:
CAUTION: Be sure to wear a properly grounded ESD wrist strap when handling the S8300
Media Server. Place all components on a grounded, static-free surface when
working on them.
5. Loosen the two thumb screws on the S8300 faceplate.
6. When removing or inserting the S8300 circuit pack, the LED module (above slot V1) must
also be removed or inserted together with the S8300.
Disengage the LED module and the S8300 circuit pack and remove them together from the
G700.
7. If the IA770 INTUITY AUDIX module (CWY1 card) is installed on the S8300A, move it from
the S8300A to the S8300B.
Note:
Note: The CWY1 unit and its associated integration is supported for upgrades of
existing installations.
8. The LED panel (above slot V1) must be reinserted together with the S8300 circuit pack.
a. Insert both the LED panel and S8300 circuit pack about 1/3 of the way into the guides
The guides are in slot V1 for the S8300 and above slot V1 for the LED panel.
b. Push both circuit packs (together) back into the guides, gently and firmly, until the front of
each circuit pack aligns with the front of the G700.
9. Secure the S8300 faceplate with the thumb screws.
Tighten the thumb screws with a screw driver.
Note:
Note: If the LED panel is not inserted all the way in, all of the status lights (on the left
side of the LED panel) will be on. If this is the case, press the LED panel all the
way in.
10. Reconnect the laptop to the services port of the new S8300B.


