


5
Upgrading an Existing G700 with an S8300 — R1.x to R2.0
Upgrade the S8300
236 Installation and Upgrades for G700 and S8300
December 2003
Verify Software Version
NOTE:
Since the system is now running a new software release, you must login with the initial
craft ID and password. (You cannot use
dadmin at this point.)
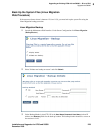
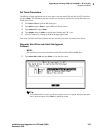
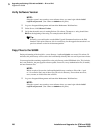
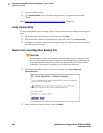
1 Log on to Integrated Management and launch the Maintenance Web Interface.
2 Under Server, click Software Version.
3 Verify that the media server is running Release 2.0 software. The Report as: string should show
R012x at the beginning of the string. For example,
R012x.00.0.219.0.
Tip:
Normally, you would need to use the Make Upgrade Permanent function on the Web
Interface at this point. However, this is not necessary for this upgrade because there is no
previous software version in the alternate partition.
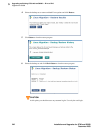
Copy Files to the S8300
During reformatting of the hard drive, a new directory, /var/home/ftp/pub, was created. For release 2.0
and later, this pub directory will be used as the /var/home/ftp directory that was used in previous releases.
You must upload the remaining required files to the pub directory on the S8300 hard drive. This includes,
but is not limited to, the post-upgrade software update, license file, Avaya authentication file (if needed),
and new firmware files.
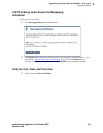
NOTE:
Before an upload, be sure the /var/home/ftp/pub directory contains no files with a *.pwd
or *.lic extension. Only one of these files can exist in a directory. If more than one exists,
move, rename, or delete all but the valid file.
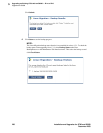
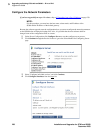
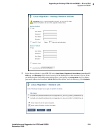
1 Log on to Integrated Management and launch the Maintenance Web Interface.
NOTE:
Since the system is now running a new software release, you must login with the initial
craft ID and password. (You cannot use
dadmin at this point.)