


5
Upgrading an Existing G700 with an S8300 — R1.x to R2.0
Upgrade the S8300
Installation and Upgrades for G700 and S8300 239
December 2003
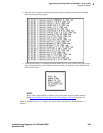
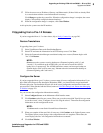
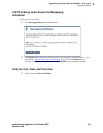
5 Fill in the correct server IP address, Gateway, and Subnet mask. (If these fields are already filled
in, overwrite them with the correct information if necessary.)
Click Change to update the system files. When the configuration change is complete, the screen
displays "Successfully configured ethernet interfaces."
6 When the configuration change is complete, click Close Window.
At this point, the system resets the IP interfaces.
If Upgrading from a Pre-1.2 Release
If you have upgraded from a 1.2 or later release, skip to Verify Connectivity on page 240.
Restore Translations
If upgrading from a pre-1.2 release:
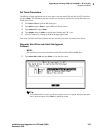
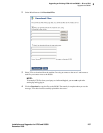
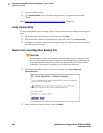
1 Select View/Restore Data under Data Backup/Restore.
2 Select FTP and enter the information for the FTP backup server. Click View.
3 Select the Communication Manager translations backup set to restore (filename begins with
"xln". Click Restore.
NOTE:
Do not restore the system or security backup sets (filenames beginning with "os" and
"security"). If you backed up the AUDIX data, you will need to restore the AUDIX
backup set as a separate step. The AUDIX translations, names, and messages backup set
filename begins with "audix-tr-name-msg". Do not restore the announcement backup set
(filename beginning with "audix-ann").
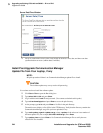
Configure the Server
If you have upgraded from a pre-1.2 release, you must enter all server configuration information. If you
have filled in the Electronic Pre-installation Worksheet (EPW), you should use the Avaya Installation
Wizard at this point. The Installation Wizard will do the server configuration and install the license and
password files. When finished with the Wizard, return to If IA770 Is Being Used, Ensure that Messaging
Is Disabled on page 243.
Or, you can enter the configuration information manually:
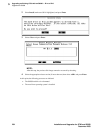
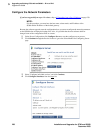
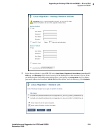
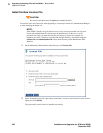
1 Select Configure Server on the Maintenance Web Interface menu.
2 Click Continue on the first two screens. When you get to the screen titled "Specify how you want
to use this wizard," select "Configure all services using the wizard." Then enter the configuration
information on each configuration screen.
NOTE:
You do not need to enter Static Network Route information.
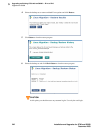
3 When you complete all the new fields, if necessary, click Continue on the Update System screen.
The Update System screen displays each configuration task as it completes. When done, the
screen displays the line "All configuration information was entered."
4 Click Close Window.