


2
Installing Hardware for the G700 Media Gateway and S8300 Media Server
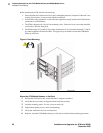
Installation and Cabling
Installation and Upgrades for G700 and S8300 85
December 2003
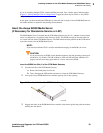
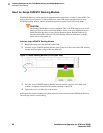
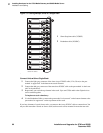
Figure 10: Tighten screws
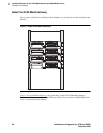
Insert the Media Modules
Following the planning documentation, you can insert the required media modules into their designated
bays. The G700 Media Gateway can accommodate up to four media modules, or plug-in circuit packs.
The choice of media modules is dictated by the offer selected by the customer and the configuration of
the system.
Consult the planning documentation and the order form to determine which modules you will be
installing. The planning documents also indicate into which slots the modules are to be inserted. The
media modules available at this time are:
• Avaya™ MM710 T1/E1 Media Module
• Avaya™ MM760 VoIP Media Module
• Avaya™ MM711 Analog Media Module
• Avaya™ MM712 DCP Media Module
• Avaya™ MM720 BRI Media Module
For detailed descriptions of the media modules see Hardware Guide for Avaya Communication Manager.
!
WARNING:
The Avaya G700 Media Gateway must not be operated with any slots open. Failure
to cover empty slots with the supplied blank plates can cause overheating due to
inadequate air distribution.
CAUTION:
The connector pins can be bent or damaged if the module is handled roughly, or if
misaligned and then forced into position.
CAUTION:
Separate ESD paths to the chassis ground connect to the media modules at the spring-
loaded captive screws. Use a screw driver to ensure the captive screws are securely
tightened to prevent damage to the equipment.
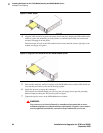
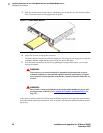
Insert media modules
1 Remove the blank plate from the empty bay.
2 Position the media module squarely before the selected bay on the front of the G700 Media
Gateway chassis and engage both sides of the module in the interior guides.