


Pan, Tilt, and Zoom (PTZ) Setup
100
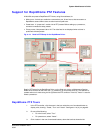
To Configure an ACUIX Dome Camera for PTZ Use
1. Run a Maintenance Session.
2. Click the Video tab.
3. Click PTZ. For information about enabling and configuring a PTZ dome, see Video Tab
Settings for PTZ, on p. 86.
4. Select an
ACUIX dome camera.
5. In Port Attributes, enter values for Baud Rate, Stop Bits, Data Bits and Parity Bits,
using those shown in table
6–3.
6. For
Camera Address, do not use the same value for two ACUIX cameras that
share the same port.
7. Repeat steps 4 to 6 for each
ACUIX dome camera.
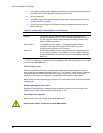
Discovery of ACUIX Dome Cameras
You have the option of running the discovery routine if domes were added or if the list of cameras
seems incomplete.
1. Run a
Maintenance Session.
2. On the Serial Devices tab, click the port to which an Intellibus device is assigned.
3. Click Discover to update the table of
ACUIX dome cameras.
Backing Up an ACUIX Configuration File to a PC
1. Run a Maintenance Session.
2. On the Serial Devices tab, click the port to which the Intellibus device is assigned.
3. Click Discover to update the table of
ACUIX dome cameras.
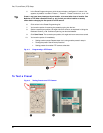
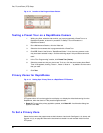
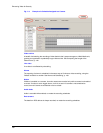
4. Select one
ACUIX dome camera or many. There is a shortcut to select all of the items in
the table: click the checkbox in the Name column; see figure
6–14.
5. Click Upload from Camera. The configuration file from each of the selected
ACUIX
dome cameras is copied to the Multi-Media DSP unit. A configuration file for an
ACUIX
dome camera includes: PTZ tours, PTZ presets, vectors and all other camera settings.
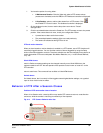
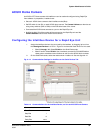
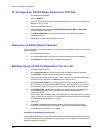
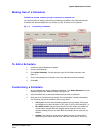
6. Click Manage Files. The Manage Files dialog box appears, showing the
ACUIX dome
camera configuration files (*.bin). See figure
6–15. The naming convention of
configuration files is:
camera name_camera address_year_month_day_hour_minute_second.bin; for example:
"Lobby_4_2007_06_16_8_0_0.bin". Firmware files may also be listed and can be ignored
for this procedure; their extension is (*.ngd).
7. Select a file.
8. Click Save. A standard Windows dialog appears, showing the drives and folders
available on the operator's PC. After selecting a drive, folder and filename, click OK.
9. In the Manage Files dialog box, click Close.
Commands in the Manage Files dialog box
This Manage Files dialog box shows only the files which are related to ACUIX dome cameras, from
among the files stored on the Rapid Eye unit. If there are no *.bin or *.ndg files, the Manage Files
dialog box displays an empty list.