


System Administrator’s Guide
Document K14392V1 Rev A 101
07/07
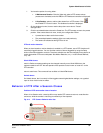
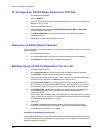
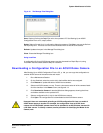
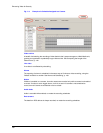
Fig. 6–15. The Manage Files Dialog Box.
Save. Copies a file from the Rapid Eye unit to the operator's PC. See Backing Up an ACUIX
Configuration File to a PC, step 8,
above.
Delete. Select a file and click. A confirmation dialog box appears. Click Yes to remove the file from
the Rapid Eye unit.. This does not remove the information from an
ACUIX dome camera.
Refresh. Updates the report in the Manage Files dialog box.
Close. Closes the Manage Files dialog box.
Using LocalView
A configuration file for an
ACUIX dome camera can also be saved to a Rapid Eye unit, using
LocalView. See the context-sensitive Help for LocalView.
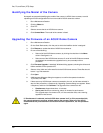
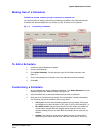
Downloading a Configuration File to an ACUIX Dome Camera
After Backing Up an ACUIX Configuration File to a PC, p. 100, you can copy that configuration to
another ACUIX camera of the same make and model.
1. Run a
Maintenance Session.
2. On the Serial tab, select the port to which the Intellibus device was assigned.
3. Click Discover to update the table of
ACUIX dome cameras.
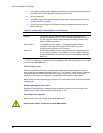
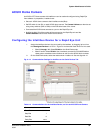
4. Select one ACUIX camera or many. There is a shortcut to select all of the cameras listed:
click the checkbox in the Name column; see figure
6–14.
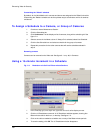
5. Click Download to Camera. A standard Windows dialog appears, showing the drives
and folders available on the operator's PC.
6. Select a configuration file (*.bin) for the
ACUIX dome camera.
7. Click Open. The configuration file is downloaded to the ACUIX dome camera.
Honeywell does not recommend uploading an ACUIX configuration file from one model of
ACUIX dome camera to another. For example, the configuration from an ACUIX dome
camera with a FCB-EX480C camera should not be uploaded to an
ACUIX dome camera with
a VK-S654 camera. To identify a camera, see the procedure for Identifying the Model of the
Camera, next.