System Administrator’s Guide
Document K14392V1 Rev A 107
07/07
Making Use of a Schedule
Flexibility: for alarms, a camera, groups of cameras or a response rule
You have the option of adding, customizing and deleting a schedule, using "Define Schedules".
A schedule can then be assigned to one camera or many, to alarms or to a response.
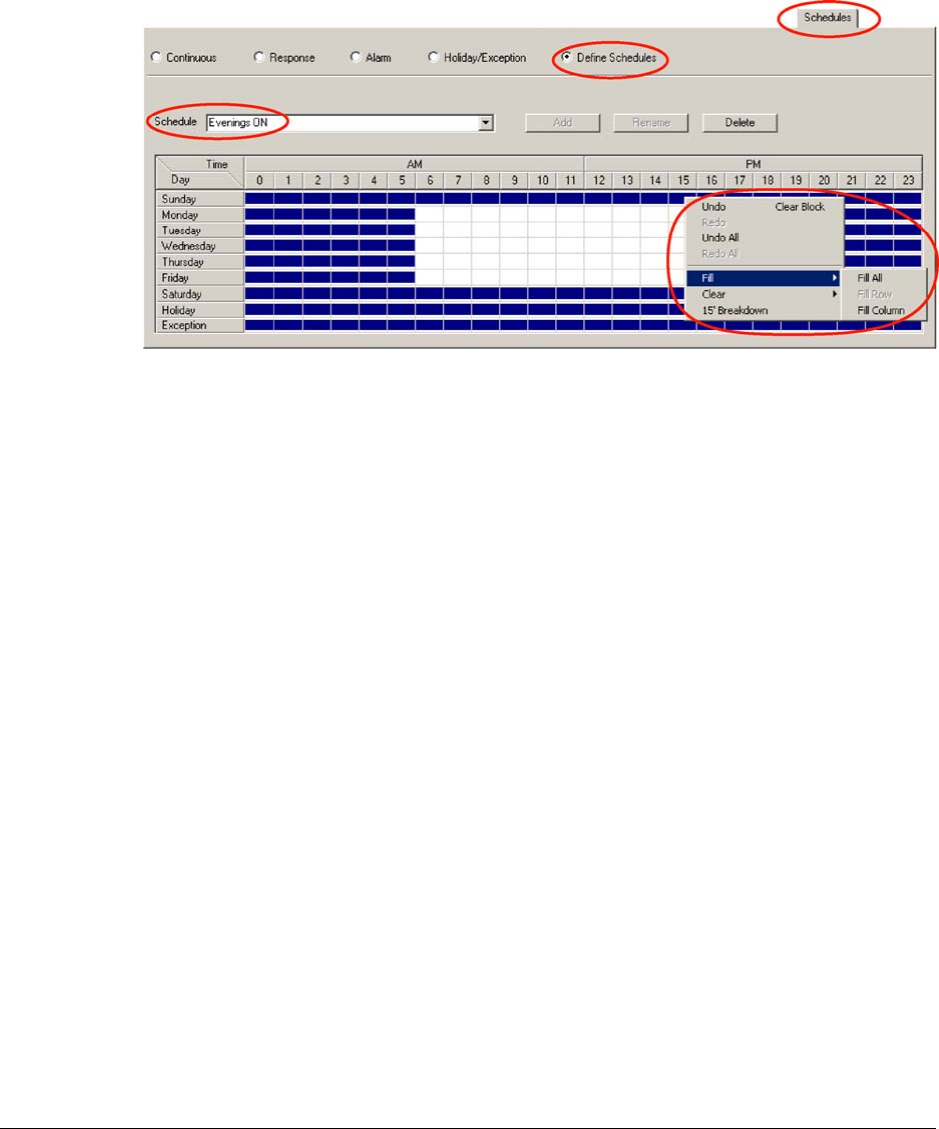
Fig. 7–4. Customizing a Schedule.
To Add a Schedule
1. Continue or start a Maintenance Session.
2. Click the Schedules tab.
3. Click Define Schedules. The tab displays the grid of the "Default" schedule. See
figure 7–4.
4. Click in the Schedule box and type a name. The Add button becomes available.
5. Click Add.
Customizing a Schedule
1. On the Schedules tab, during a Maintenance Session, click Define Schedules. The tab
displays the grid of the "Default" schedule. See figure
7–4.
2. Use the Schedule box to select the schedule that you want to customize.
3. Click cells in the Time/Day grid as needed. The customization is saved automatically.
The Time/Day grid can be modified in various ways, either:
• Cell-by-cell. Click the cells of the Basic schedule grid as needed. Clicking the
cells toggles a time from ON (dark) to OFF (light), or OFF to ON. See figure
7–4.
• By a block of cells. Drag the mouse pointer over cells. When you release the
mouse button, the cells within the dragged area change color and a menu
appears showing Fill block and Clear block commands. Click a command, as
needed.
• Globally. Click the other mouse button to display a menu of commands for
customizing more than one cell at once: Clear row, Clear column, and so on.


