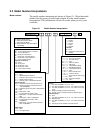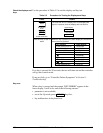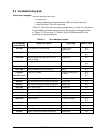
4/00 UDC 3300 Controller Product Manual 237
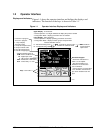
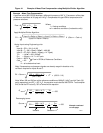
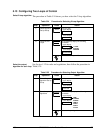
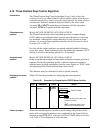
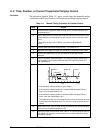
Procedure
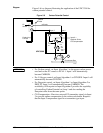
The procedure for calibrating the Position Proportional output and
3 Position Step control output is listed in Table 8-3. Make sure
LOCKOUT in Tuning Set Up group is set to NONE. See Section 3 –
Configuration.
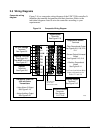
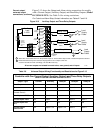
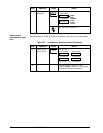
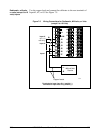
For Three Position Step Control Output models without Motor Position
Indication, do steps 1 and 2 only.
For Position Proportional Output and Three Position Step Control Output
models with Motor Position Indication, follow the entire calibration
procedure.
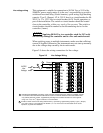
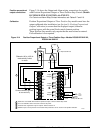
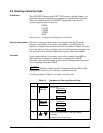
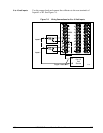
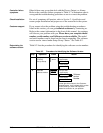
ATTENTION
These prompts only appear when position OUT ALG is
selected. If motor position for 3PSTEP is desired, first configure unit for
“position.” After calibration the unit can be switched to 3PSTEP.
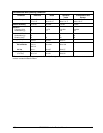
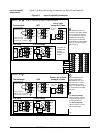
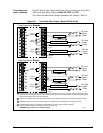
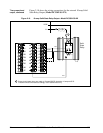
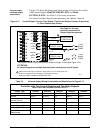
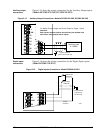
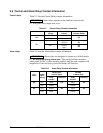
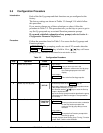
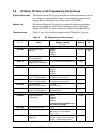
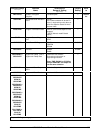
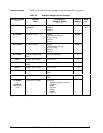
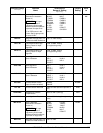
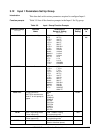
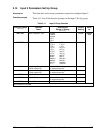
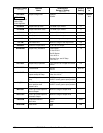
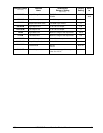
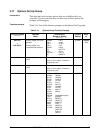
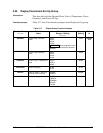
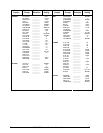
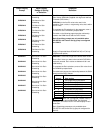
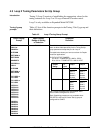
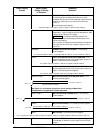
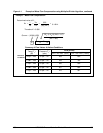
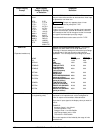
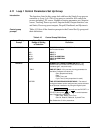
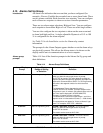
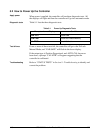
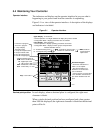
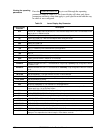
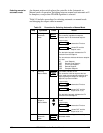
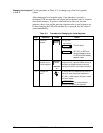
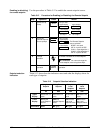
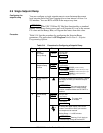
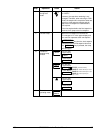
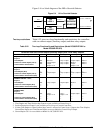
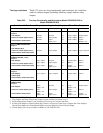
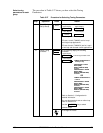
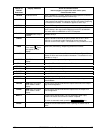
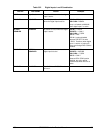
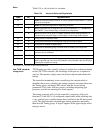
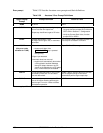
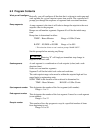
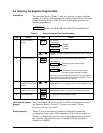
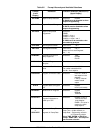
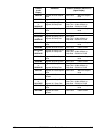
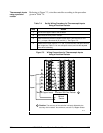
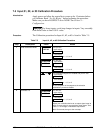
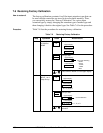
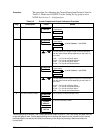
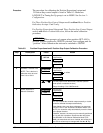
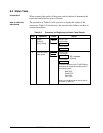
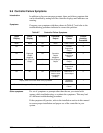
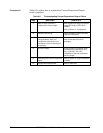
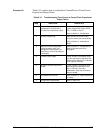
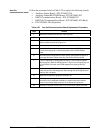
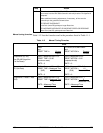
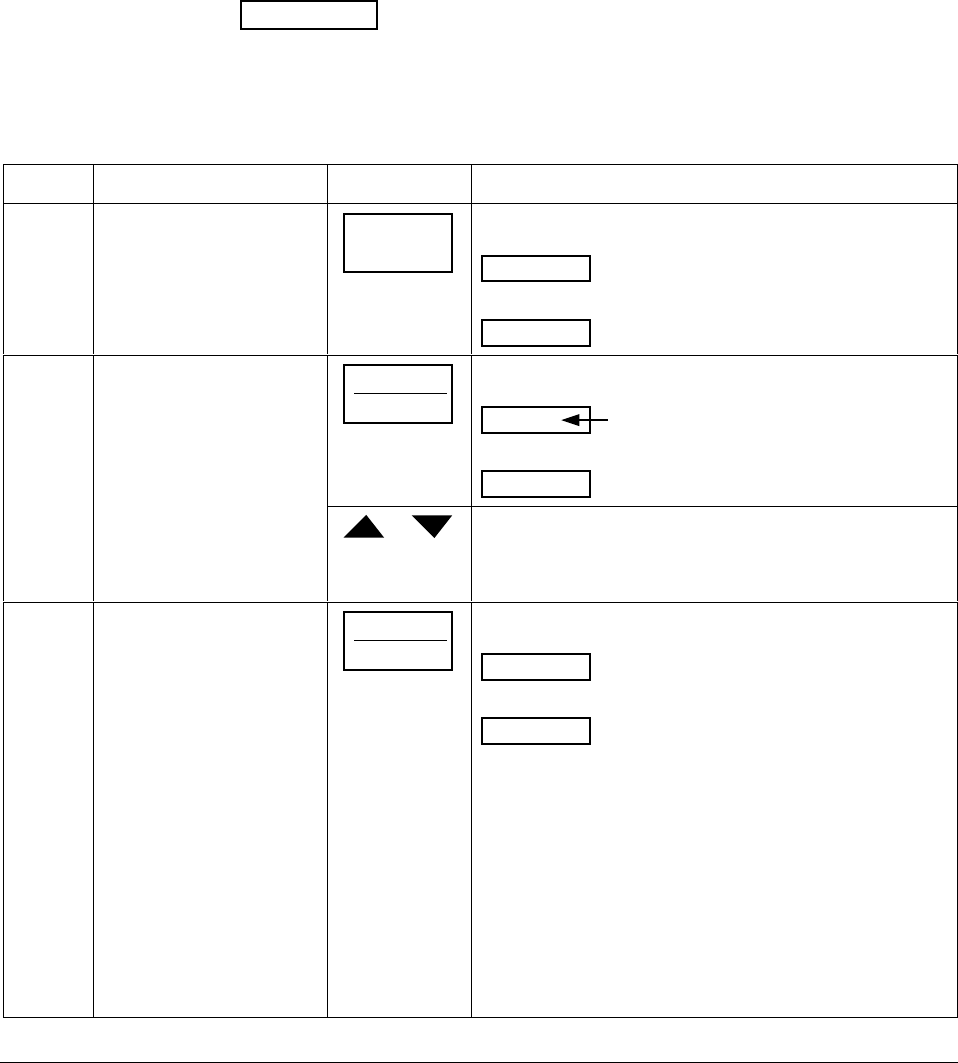
Table 8-3 Position Proportional and 3 Position Step Output Calibration Procedure
Step Description Press Action
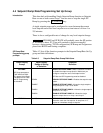
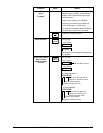
1
Enter Calibration Mode
SET UP
until you see
POS PROP
Lower Display
CALIB
Upper Display
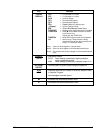
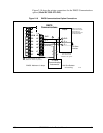
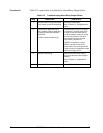
2
Set Motor Traverse Time
NOTE: This is the time it
takes the motor to travel
from 0 % to 100 %.
FUNCTION
LOOP 1/2
until you see:
Lower Display
Upper Display
MTR TIME
a value
or
until the proper motor stroke time is reached (see the
motor specs or measure the time)
Range of setting = 5 to 1800 Seconds
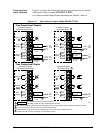
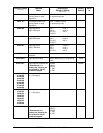
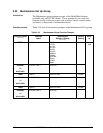
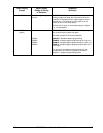
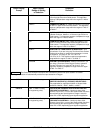
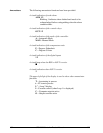
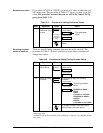
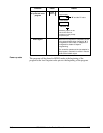
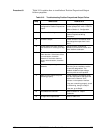
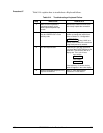
3
Select Automatic or
Manual Calibration
FUNCTION
LOOP 1/2
until you see:
POS PROP
Lower Display
DISABLE
Upper Display
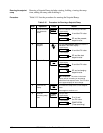
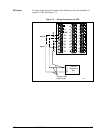
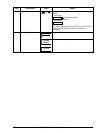
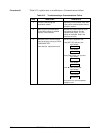
You can calibrate the controller output manually or let the
controller calibrate the output automatically.
If the slidewire has never been calibrated, you must use
DO AUTO first. In the “Automatic Calibration Mode” (DO
AUTO), the controller relays automatically move the motor
in the proper direction.
If desired, however, the motor may be manually positioned
to 0 % and 100 % positions. Disconnect the relay wires.
Use DO MAN. In the “Manual Calibration Mode” (DO
MAN), the motor does not move. Instead, the existing 0 %
and 100 % values may be changed with the ▲ or ▼ key.