


Troubleshooting & Repair Teledyne API - Model 200EH/EM Operation Manual
272
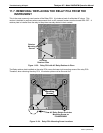
3. If the TEC is to be replaced, remove the reaction cell assembly at this point by unscrewing two holding
screws. This is necessary only if the PMT cold block is to be removed.
This step is not necessary if the HVPS or the PMT only are exchanged.
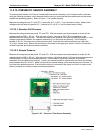
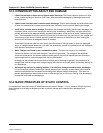
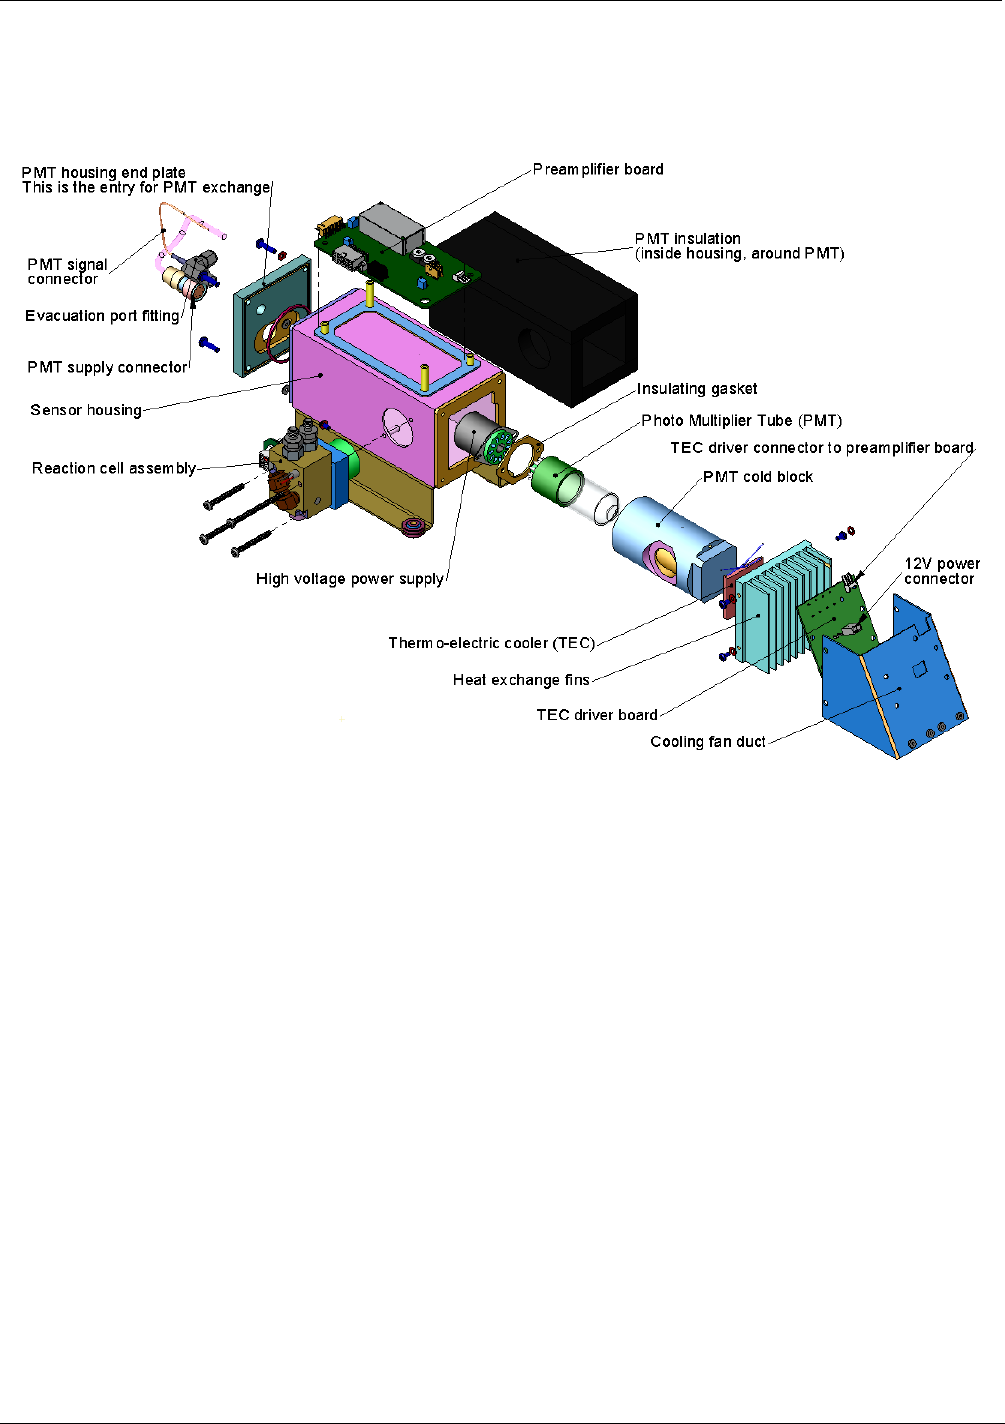
Figure 11-22: M200EH/EM Sensor Assembly
4. Remove the two connectors on the PMT housing end plate facing towards the front panel.
5. Remove the end plate itself (4 screws with plastic washers).
6. Remove the dryer packages inside the PMT housing.
7. Along with the plate, slide out the OPTIC TEST LED and the thermistor that measures the PMT
temperature.
Both may be coated with a white, thermal conducting paste.
Do not contaminate the inside of the housing with this grease, as it may contaminate the PMT glass
tube on re-assembly.
8. Unscrew the PMT assembly, which is held to the cold block by two plastic screws.
9. Discard the plastic screws and replace with new screws at the end of this procedure (the threads get
stripped easily and it is recommended to use new screws).
10. Carefully take out the assembly consisting of the HVPS, the gasket and the PMT.
11. Change the PMT or the HVPS or both, clean the PMT glass tube with a clean, anti-static wipe and do
not touch it after cleaning.
04521C (DCN5731)