


Chapter 10 Jobs 279
CHAPTER 10
4.
Press to move the L/R channel mode setting, and then turn the dial to select the
L/R channel mode. Then press [OK].
▼ The screen displays SELECT TRACK, prompting you to select the track on which you
want to record the sample.
5.
Select the destination track.
Select the track by pressing a bank selector and/or track pad. The bank number and
meter bracket change to indicate the track selection. Remember that you must select
an empty LOOP, COMPOSED LOOP, or FREE track.
NOTE:
If you select a track that already has a sample on it, the screen displays the
TRACK NOT
EMPTY
message. Change the track selection, or press [CANCEL] as necessary to return
to the main screen.
6.
Press [OK].
▼ The screen displays START SEQ.
You now have two choices:
(1) You can begin to resample immediately from the current song position, simply
by pressing the [SAMPLING] button; or...
(2) You can start song playback first by pressing the
button. The song starts from
the current position, and the screen displays PRESS/START STOP. Wait for the
song to reach the location at which you want to start recording, and then press
the [SAMPLING] button to begin resampling.
NOTE:
In either case you are free to adjust the song position ahead of time using the various se-
quencer buttons, the dial, or your preset markers. But keep in mind that some positional
adjustments may cause the song to jump over important sequence causing the song to
sound different from what you’d expect. To avoid this problem, you may want to allow
the song to play out normally starting from the location of a recorded scene-recall event
(or starting from the top of the song).
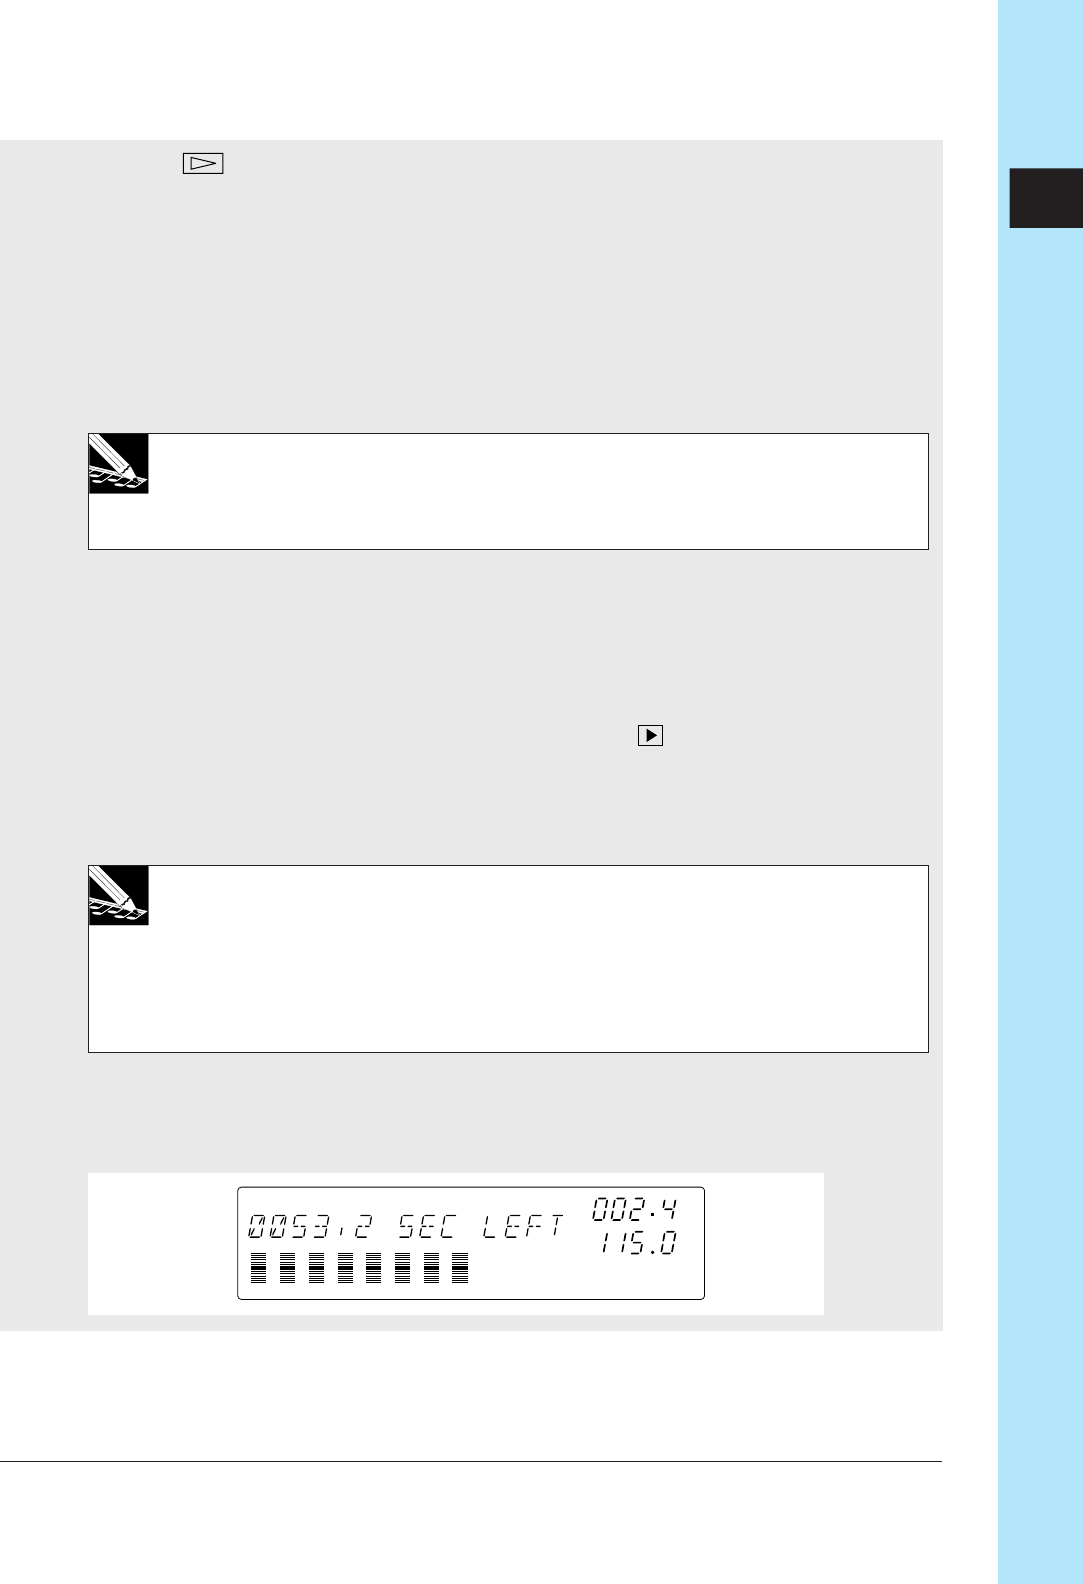
7.
Begin resampling as described above.
▼ The SU700 begins resampling. The screen keeps you informed of the remaining
available recording time and the current song location, and the current BPM setting.