Chapter 10 Jobs 289
CHAPTER 10
●
If the disk in the drive is unformatted (or has a non-MS-DOS format): the FORMAT
NOW? message appears. If you wish to format the disk, press [OK]. (Keep in mind
that this will destroy any data already on the disk.) The SU700 will detect whether
the disk is 2HD-type or 2DD-type and will format it accordingly. When formatting
is completed, the SU700 automatically begins saving as described in step 6 below.
●
If no disk is present in the drive, the screen will display NO DISK. Insert a disk,
then press [OK] and proceed again from the top of step 5 (Or else press [CANCEL]
as necessary to move back to a previous step or quit the job.) When the save is
completed, the display returns to the main screen. (If the data doesn’t fit on a single
disk, you will need to continue on another disk. See step 6 below.)
●
If a disk is present but is write-protected, the WRITE PROTECTED message ap-
pears. Remove the disk, release the write-protect tab (or change to a different, un-
protected disk), insert the disk, and then press [OK] and proceed again from the top
of step 5. (If you press [CANCEL] instead, the SU700 will display the CHANGE
DISK message. In this case, too, you can simply unprotect and reinsert the disk, or
else insert a different disk, and then press [OK] to continue.)
6.
If the volume will fit on a single disk, the SU700 displays SAVING as it saves the
data. When saving is completed, the SU700 returns you to the main screen.
▼ If the volume will not fit on a single disk, the SU700 displays SAVING FD01 as it
saves the data into the first disk. When the disk becomes full, the SU700 displays
the CHANGE DISK message. Remove the disk, then insert another empty disk and
press [OK] to proceed with the save. The SU700 will now display SAVING FD02.
Continue as necessary until the volume has been saved.
●
Although you cannot cancel the save while the SU700 is writing to disk, you are
free to cancel whenever the CHANGE DISK message appears. Note that if you can-
cel during a multi-disk save, you will not be able to reload the saved data.
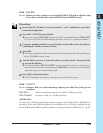
If saving to a SCSI disk
5.
Press [OK].
▼ The screen displays VOLUME=
volume_name
, prompting you to select the volume
into which you want to save your data.
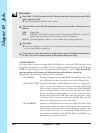
6.
Turn the dial to select the disk volume into which you want to save your data.
●
If you wish to create a new volume for the save, turn the dial to select
VOLUME=NEW VOLM. (This selection is forced if the disk does not yet have any
volumes on it.)
●
If you wish to save into an existing disk volume, turn the dial to select the volume
by its name.
IMPORTANT
If you save into an existing disk volume, all data already stored in that volume will be lost.


