


Chapter 2 Tutorial 77
CHAPTER 2
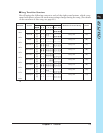
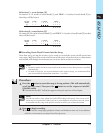
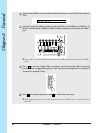
● Section C = scene button [E]
Un-mute CL 1–4 tracks of track bank [1] and FREE 1–4 tracks of track bank [2] so
that they will be heard.
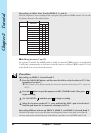
TRACK LOOP C.LOOP FREE
BANK 1 2 1234 1234
[1] ××
××××
[2] × × ××××
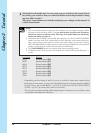
●Section D = scene button [F]
Un-mute CL3/4 tracks of track bank [1] and FREE 1–4 tracks of track bank [2] so that
they will be heard.
TRACK LOOP C.LOOP FREE
BANK 1 2 1234 1234
[1] ×× ××
××××
[2] × × ××××
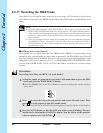
■ Recording Scene-Recall Events Into the Song
Now that we’ve set up the scenes, we’re ready to record the scene-recall events into
our songs. We’ll record a scene-recall event at the start of each section, so that mutes
and sound will change as necessary as we move from section to section.
NOTE:
• We don’t need to record a scene-recall event for Intro A, since the top scene is recalled
automatically.
• To make it easier for you to press buttons at the correct timing, we recommend that
you record with the metronome turned on. (
→
p.298 )
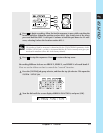
Procedure
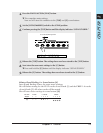
1.
Press the button to return the song to its top position. (This will automatically
recall the top scene.) Then press the
button to set the sequencer into REC
STANDBY mode.
▼ Confirm that the REC indication appears along the top line of the display
NOTE:
You do not need to worry about the QUANTIZE setting at this point, since scene-recall
events are never quantized. When you use a scene button to record an event, the event
is recorded into the song at the precise location at which you release the button.
2.
Press to begin recording.
▼ You will hear the song begin playback. Mutes and knobs are now set in accordance
with the environment you stored into the top scene.