


5 Upgrade and repair procedures
Replace the TN2314 Processor circuit pack
226 S8100 Installation and Upgrades
November 2003
Replacing a TN795 with a TN2314
NOTE:
If you have any additional login accounts and passwords or software that is not
Communication Manager loaded on the system, you will have to reconstruct or reload this
information on the new TN2314 or it will be lost. Write down any information you need
from the old system that will enable you to add it to the new system.
Follow the steps in the Job Aid, Upgrade an S8100’s R9.5 software by replacing the S8100
on page 26 to
replace the TN795 with the TN2314 Processor circuit pack.
Replace the TN2314 Processor circuit pack
This section outlines the procedures to replace an existing TN2314 Processor circuit pack.
NOTE:
If the TN2314 circuit pack is replaced for repair, a new license file must be obtained and
installed. Communication Manager, INTUITY AUDIX, and SNMP will not start if the
license file does not match the new TN2314’s serial number. Ensure that the new circuit
pack has solved the problem before you access RFA to update the license file.
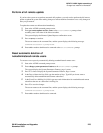
See License file, password file, and installation script overview
on page 164 and subsequent sections, for
information about obtaining and installing license, password (authentication), and installation-script files.
NOTE:
When you swap out a processor that has an RFA-generated license file, the faulty
processor must be returned to repair. It is not re-usable because the serial number of the
swapped out processor has been captured within an SAP database and is marked as
unusable. If you try to generate a license against it, you will be denied.
To replace a TN2314 circuit pack, follow the steps in the Job Aid, Upgrade an S8100’s R9.5 software by
replacing the S8100 on page 26, and substitute “new TN2314” for “TN795.”
Replace the hard disk
The hard disk on the TN2314 Processor circuit pack will need to be replaced if it is defective or needs to
be upgraded. To replace the hard disk, follow the steps in the Job Aid, Replace an S8100’s hard drive
on
page 20.